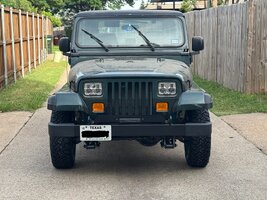
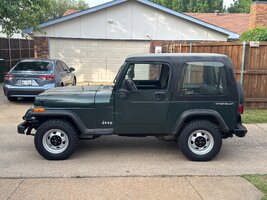
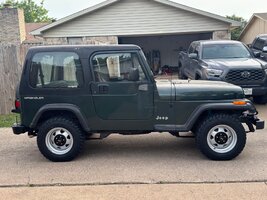
1994 Hunter Green SE “Back to Stock” Thread

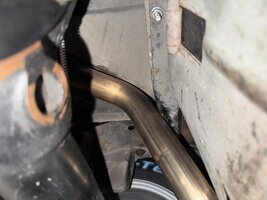
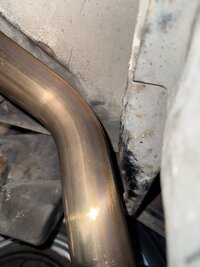
As for your setup, yeah I noticed the same with the walker tailpipe. It goes into the muffler which is unnatural/backwards for flow. This is what I think I’m figuring out was stock for the 92 muffler to cat connection as well, and is also odd.

Yeah, that was my exact thought when I was lining it all up. That tail pipe going IN to the muffler exit, made zero sense to me. It's a tight turn too so I know I have a small leak there as well. I have been looking around for a better tail pipe section for it. It also looks kinda lame at the back of the Jeep.
 
  • Like
Reactions: machoheadgames
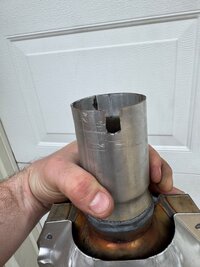
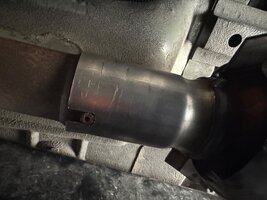
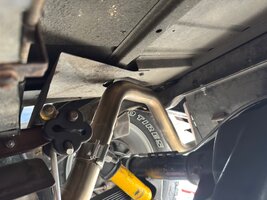
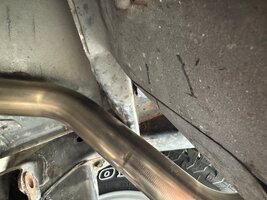
Good news! I finally got the exhaust problem solved. Like I mentioned earlier, the factory cat has an alignment slot that indexes onto a nub welded to the factory down pipe. Aftermarket cats do not honor this design, they come with a solid pipe that contains no slot. As such, the cat bottoms out too early on the pipe and keeps the muffler and tailpipe from moving far enough forward to clear the fuel tank frame crossmember.

To remedy, I removed everything from the cat to the tailpipe again, and ground in a slot on the cat. Only took a couple minutes using a grinding disc and then some filing to clean it up. Results of that below:

IMG_0971.jpeg

IMG_0973.jpeg

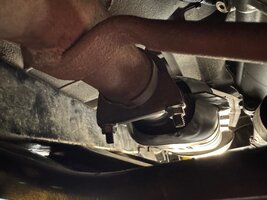
The result is that the cat moved about 0.75-1” further forward. From here, I was able to slide the muffler onto the cat as far as it would go, which gave me lots of room to mess with tailpipe and tip adjustment. At first, I thought I still had a problem as getting the tip installed straight then forced the tailpipe weird and jammed the muffler up into the muffler hanger bracket.

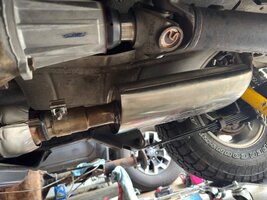
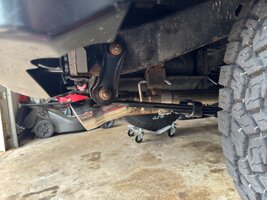
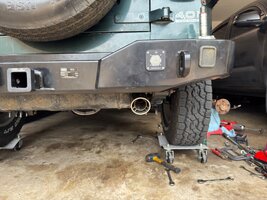
However, I loosened the tip back up, adjusted the muffler some as well as the tailpipe, then tightened that connection and then was able to get the tip in alignment without messing everything else up. The result is a fully installed system with a tip that is straight and looks right. I also installed the tip as far forward as it would go (before the hanger hits the hanger bracket), to keep the chrome tip as hidden and inconspicuous as I can.

It’s a bit gaudy but you don’t see it much anymore besides a circle from behind. I can live with this for sure.

This will be the permanent setup. So glad the exhaust project is finally behind me and has no more issues!

IMG_0975.jpeg

IMG_0976.jpeg

IMG_0977.jpeg

IMG_0978.jpeg

IMG_0980.jpeg

IMG_0979.jpeg

Next up, I have the OEM front spring plates from eBay arriving tomorrow, as well as the proper speedo gear for the new stock size tires. So hopefully tomorrow I can throw those on real quick. Now with the exhaust out of the way, I am finally going to focus on building and painting that rear axle so I can swap it in.

At some point I’m going to swap on the bumperettes, but no rush on those.
 
Well, I’m not in the clear yet. Although I think I’m close. Went out for a 20 minute drive around town and by the time I got back home, the tailpipe was barely rattling against the crossmember. Irritating as always. It’s very slight, though. I’m thinking in all my adjustments, I probably did something that knocked it off without realizing it. At one point I had no doubt plenty of clearance. Likely adjusting something else messed that up.

Whenever I feel like crawling again (and when it’s not all warmed up), I’ll get back under there and make more adjustments to see if I can get it to quit once and for all.

If the tailpipe was tweaked more towards the passenger side just by half inch or so, I would have tons of clearance. Sadly the way they aim this pipe puts it not really in the right spot which really takes away any clearance you may think you have. It is not inside the semi circle formed in the crossmember.
 
It appears the problem is the system is rotating despite being clamped. I can absolutely install it with enough clearance to not rub….but if it spins back even while clamped, then that’s no good. Gonna keep an eye on it. Maybe smaller clamps so I can really get down tight on it. I currently have the nuts cinched all the way down, which seems like it should be enough, but maybe not. Who knows. It’s pretty snug but it will move if I push on it, so guaranteed vibrations and shaking around from the road and torque will spin it again. It needs to be tight.
 
Last edited:
I should have known, there is a proper way to install band clamps. I didn’t exactly follow it proper on any of them, but the one moving was the biggest offender. According to a video I watched, you want the clamp hanging slightly off the larger pipe by at least about 1/8”, which provides the greatest clamping down on the outside pipe. I had the edge of the clamp at least 3/16” or inside the large pipe only, which made it not clamp well enough.

I also was not paying attention enough and had the center piece on the clamp sitting on one of the slots of the outside pipe, which is a no-no. Rotated the clamp, repositioned it hanging off the joint a bit, and tightened it down. I think we’re good now, I’ll drive it tomorrow or something to see. It seems I can no longer twist the muffler with my arms like I could before, so hopefully I’m good now. If that doesn’t work then I’m tack welding the pipes.
 
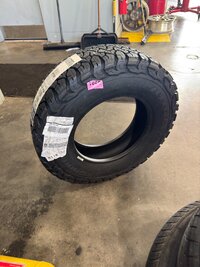
Left work a bit early to get an important task done: new tire install! These look surprisingly good for how small they are. They are also quite heavy and the sidewalls are substantial. More than I expected for a C load. Hopefully they turn out to be good tires.

IMG_1004.jpeg

IMG_1005.jpeg

I’ll post some photos once they’re on.
 
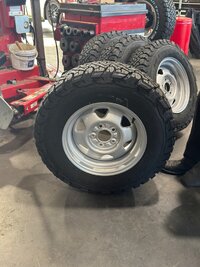
The shop ran out of tire weights (they’re not really a tire shop, they’re an automotive repair shop that does tires on the side), so I’m picking them up tomorrow. I did get to see the tires mounted though. I think it looks great. No regrets on the decision to go stock wheel and size, so far.

IMG_1006.jpeg

IMG_1007.jpeg
 
  • Like
Reactions: Plastic Fury
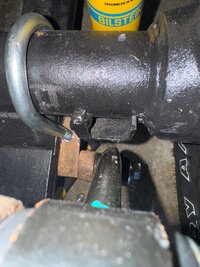
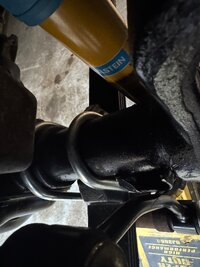
Received the leaf spring plates today. The right side plate is in poorer shape than the photos really could show me, so I won’t be using that one. However, I installed the left side plate and good news - the problem is solved! So it definitely is slight differences in the plates. Now, I’m going to find a better condition set of plates, and possibly try to find brand new. At least I know how to solve the problem, which is relieving.

On the ground:

IMG_1013.jpeg

With the left side jacked up:

IMG_1014.jpeg
 
Tires are back and installed. I think it looks good, nice and clean stock like I’m after.

Since the interior is all cluttered, hardtop isn’t fastened perfectly, etc, I haven’t driven it much, although I did take it out for a few miles and had it up to 50 or so. Drives good.

I really need to wash the dusty areas so it’s not so filthy looking. Maybe this weekend.

IMG_1021.jpeg

IMG_1020.jpeg

IMG_1022.jpeg
 
@TRevs I got another data point. It’s nothing new really, but it confirms what I expected. I installed my new 15x7 spare with 215/75R15 tire, and the 1.62” snubbers worked perfectly. I put it up there with the 1.22” still on the tailgate, and that didn’t work. They basically didn’t even touch the tire.

They could be tighter (probably would be perfect with a 225 tire), but these definitely work on this setup.

I would say try the 1.22” for your combo. I will say, my tire sits mostly straight up and down, although the lower snubbers push on the tire a bit less than the upper ones that are in the middle of the tire. So I’m not really sure what’s going on with yours, but maybe if you got the 1.22’s it would fix itself.
 
The exhaust on this thing is really kicking my ass. The tailpipe is hitting the crossmember again. I got my new tires installed and then drove around for a bit. When I got home, the pipe was hitting. I parked it and checked it later and it was not hitting, it was back to having about 5/16” or so between the tailpipe and crossmember.

I wiggled the exhaust around and I personally can not possibly move it by hand to force it into the crossmember, when it’s parked, cool and has the gap. After trying to make it touch and failing, I got up, drove it less than a mile, went into a parking lot and looked. Touching. So it either has to be something with heat and expansion, or torque from driving. Or maybe both. I’m at a loss.

I did everything I could to make clearance. I can’t make anymore clearance than this unless I go to a magnaflow cat with more pipe that is able to be cut. But even then, the muffler is moving further forward and eventually the hanger brackets will hit the muffler heat shield. So that only works for so long as well.

I really don’t know what the hell is going on. I looked at the cat to see if it’s sliding backwards, but I got the clamp on it as tight as I could and it still appears that the slot I ground in is still bottomed out on the welded nub, so I don’t think the cat has moved. The header is tight, the downpipe is tight to the heater.

IMG_1046.jpeg
 
The exhaust on this thing is really kicking my ass. The tailpipe is hitting the crossmember again. I got my new tires installed and then drove around for a bit. When I got home, the pipe was hitting. I parked it and checked it later and it was not hitting, it was back to having about 5/16” or so between the tailpipe and crossmember.

I wiggled the exhaust around and I personally can not possibly move it by hand to force it into the crossmember, when it’s parked, cool and has the gap. After trying to make it touch and failing, I got up, drove it less than a mile, went into a parking lot and looked. Touching. So it either has to be something with heat and expansion, or torque from driving. Or maybe both. I’m at a loss.

I did everything I could to make clearance. I can’t make anymore clearance than this unless I go to a magnaflow cat with more pipe that is able to be cut. But even then, the muffler is moving further forward and eventually the hanger brackets will hit the muffler heat shield. So that only works for so long as well.

I really don’t know what the hell is going on. I looked at the cat to see if it’s sliding backwards, but I got the clamp on it as tight as I could and it still appears that the slot I ground in is still bottomed out on the welded nub, so I don’t think the cat has moved. The header is tight, the downpipe is tight to the heater.

View attachment 123869

So this post was 53 minutes ago, and I just went back out there. Absolutely nothing has changed besides the exhaust cooling down during that time frame. I now have this much clearance by comparison:

IMG_1049.jpeg

I think I have a heat expansion problem. I think SS expands quite a bit and might be growing enough to push into that crossmember.

I don’t know what my next move is but I’m leaning towards a magnaflow cat so I can cut more to make more room. I had one in the past and I really don’t think I threw it out, but I can’t find it. Which is a bummer because they are expensive now. It feels like a new cat with more room to cut is my only possible solution. I can’t think of anything else besides maybe a muffler shop making me a new tailpipe or rebending mine so it has more clearance.

What a damn headache. It’s a minor issue but I end up stressing myself out about it because I want it resolved.
 
@TRevs I got another data point. It’s nothing new really, but it confirms what I expected. I installed my new 15x7 spare with 215/75R15 tire, and the 1.62” snubbers worked perfectly. I put it up there with the 1.22” still on the tailgate, and that didn’t work. They basically didn’t even touch the tire.

They could be tighter (probably would be perfect with a 225 tire), but these definitely work on this setup.

I would say try the 1.22” for your combo. I will say, my tire sits mostly straight up and down, although the lower snubbers push on the tire a bit less than the upper ones that are in the middle of the tire. So I’m not really sure what’s going on with yours, but maybe if you got the 1.22’s it would fix itself.

I bought a set of 4 1.22” bumpers from a reseller. They are pretty close to the right width and I plan to just shim them out with ~3/16” rubber fender washers or rubber mat.

I have about decided to cut and reweld the damaged part of the carrier to get it to sit more squarely with the gate.

I also have to shim out the wheel on the carrier studs a bit because the rim hits the lower part of the carrier. I plan to tack weld a couple fender washers on each stud.

Interesting. If you are having to add 3/16" to the 1.22" bumpers, I suspect the 1.62" might still be correct, and maybe the issue with them is the carrier after all? Obviously your carrier issue is worse than I thought, since the wheel is hitting it. That makes me think if the carrier was fixed up back to perfect, then one of the two bumpers should work off the shelf, just like a stock TJ with the 30x9.5 package would have.
 
No pictures to provide (I’ll grab some next time I make an adjustment), but I picked up some bleepinjeep alignment plates, which bolt to the rotor and provide places to measure so you can set your toe angle.

I’m not 100% sure I got it right, so I will be digging back in soon. When I was done with the job, the wheels were no longer still straight, they had moved off of straight a little bit, which screws up the measurements. However, when I started out, the wheels were straight and I indeed seemed to find toe out of about 0.08°, which is no good. You don’t want any toe out on a RWD vehicle. Even if the factory service manual says the spec allows for toe out, it will not drive right if you set it that way.

I set it to some toe in, and thought I achieved about 0.16° of toe in. However, by the time I finally did my last measurements, the wheels were turned by then. So my measurements are not accurate and I’m not sure what the toe actually is currently.

Regardless, it is steering a lot better than before. It’s a lot easier to track straight than it was before, and it’s a lot more predictable under braking. Before, while braking, it may pull to one side or another. It was a handful for sure, and was only reasonable to drive when going perfectly straight.


Still don’t know what I’m doing about the exhaust. It still keeps growing into the rear crossmember, and cools back down making clearance. I might sadly be putting the louder magnaflow back on for the time being. What a pain.


One other thing I noticed, is having the spare tire installed makes me a bit nervous. When it’s tightened down, I notice a bit of a crease at the bottom of the tailgate, in line with the very bottom lip of the tire carrier. It makes me think that the thick load C tire carcass is applying pressure and forcing the tire carrier tightly against the tailgate. I might put a washer on each lug stud or something to space the tire out a tiny bit. Not sure yet but I really don’t want it to damage my tailgate.

If the tailgate is creasing at the lower edge of the carrier it sounds like like that spot is a fulcrum and a torque is being applied above. Maybe the tire is pressing into the upper snubbers disproportionately?
 
If the tailgate is creasing at the lower edge of the carrier it sounds like like that spot is a fulcrum and a torque is being applied above. Maybe the tire is pressing into the upper snubbers disproportionately?

Not sure. I know it presses into the uppers pretty tight, and not as tight as the lowers, but I would assume that is pretty much by design due to where the lugs are relative to the bumpers. Also, the bumpers land on different parts of the tire down low depending on the size of the tire. I think all is operating as normal, except that the tire is a heavier thicker tire and might be exerting too much force back on the bumpers, given that the crease is occurring.

I actually meant to cancel the order for the 5th tire, but my guy had already gone through with it and it was on the truck, so I was stuck with it. I am thinking I might pick up a P rated tire and put it on the 15x6 wheel, and use the 1.22 bumpers most of the time. That would be a lot lighter than the BFG combo and 15x7 wheel, and it would keep the load closer to the tailgate with the narrower wheel. All that plus the tire being identical size to stock, mgiht make for a better setup that doesn't hurt the tailgate.

Sucks to have wasted money on the tire and wheel but I can still keep them around in case I went on a trip or damaged a wheel or something.

Either that or I try the washer on each lug and see if that fixes the crease while keeping the tire tight.
 
I worked on the toe a bit more. Think I got it right where I want it….if my measurements are correct, then I’m around 0.25° toe-in, which is the max spec. It feels good to drive. Hopefully being at the max of the spec doesn’t wear the tires out quickly. It feels good to drive now, doesn’t wander.

I’m still curious about the steering gear. The factory steering gear for 92-95 YJs is variable ratio, 16-13:1, which means it’s a slow ratio (higher torque) closer to center, and towards each end at full lock the gear teeth profile angles and speeds up the ratio to 13:1. This gives good torque to the driver off-road at low speeds and makes it easier (less twitchy/slower response) to control at high speed, while giving you more turning speed at low speed tight turns, like parking lots.

The XJs were all 14:1 fixed ratio (longer wheelbase, so less twitchy in general), and the TJs were mostly variable ratio 15-13:1, so just slightly lesser ratio than a YJ, but they had a stronger power steering pump driving it.

What I’m getting at, is that the Lares 11353 gearbox that I am using is advertised to fit a whole bunch of vehicles, including the YJ, TJ, and XJ. Seems like the easy way to make a steering gear is fixed ratio, which I imagine this one is.

I think I’m going to order a good used OEM gear that I know will put me back to the stock variable ratio. With the short wheelbase I prefer a slower steering response.

The interesting thing is, the early YJ (87-91) is plastered all over the FSMs as being 14:1 fixed ratio. So for some reason, starting with 91-92ish, they switched over to the variable ratio. Then they kept the variable ratio (except changed from 16 to 15) in the TJ.

All this to say, I liked the way it drove stock, and so I think I’m going to put myself back to stock with a good condition used gear. I found a clean one on eBay that was known to be working well with no leaks or problems. It will be interesting to see how the feel changes from the new gear to the OEM.
 
Well, good news on the steering. Like I've mentioned before, I initially bought a BBB steering gear, and then while I had "back in stock" alerts turned on for Lares steering gears, those showed back up and so I ordered one. Two steering gears at my disposal. I already had the BBB hanging on the frame and hooked up, because it arrived before the Lares notifications alerted me that Lares were back. So I had it hooked up, but the Jeep had the engine out at that time, and so it was a quick simple job.

The Lares then arrived, and I was curious to see how it felt (engine off), so I swapped it on. I left it on since then and that is what all the driving thus far has been with.

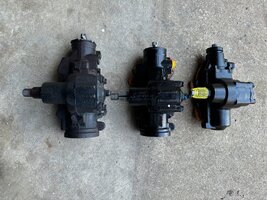
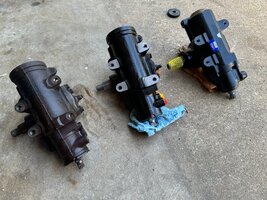
I worked more on the toe last night, and got it fully dialed in at 0.25 degree. So I know I'm good on alignment. And while it drove "good", it still didn't feel like stock. So last night, I started looking more into the different steering gears, and decided to install the BBB I had on the shelf. Like I mentioned before, the Lares is advertised to fit a whole bunch of vehicles. Just the XJ/TJ/YJ fitment is enough to tell me that it's more of a universal approach and not a correct fit. XJs used a 14:1 fixed ratio, late YJs 13-16:1, and TJ 15-13:1....how can it fit all of them? Well, it works, it just doesn't feel like stock. I am not 100% sure, but I think the Lares is a 14:1 fixed, and matches the feel of a stock XJ. Sporty, but hard to control in a short wheelbase YJ.

The BBB looks pretty much identical to stock, and it's only advertised to fit the YJ, a Wagoneer, and some other old old Jeeps that all used variable ratio 13-16:1 gears. This makes me think the BBB is the proper variable ratio unit.

I installed it last night. Bit frustrating of a job, there is just not much room for installing the threaded line fittings with the short lengths of the hoses. I got it installed and bled the bubbles out of the fluid. With engine off, the steering feels noticeably easier at center, further supporting the idea that it is a variable ratio gearbox.

I deliberately woke up early before work this morning and went for a 20 minute or so drive. WOW....it drives like normal again. The response is good, the feel is light but not too easy, it's easy to control around curving roads at speed. It finally feels like it drives as it should. What a crazy difference just adjusting toe and putting in a proper fit steering gear accomplished. I finally feel comfortable with the way this thing drives and handles.

Now, I still have the gear from eBay on the way...I'm going to keep that one and probably install it because I know it should function the same. I would rather run on the OEM. But I know I can keep the BBB as a solid backup spare just in case. I'll seal off the ports so it stays in good shape, and then have a good solid option if I ever need it.

Probably going to sell the Lares. I don't need it. That thing belongs in an XJ IMO. With the way the Jeep drives now, I don't want that one back in the YJ. I don't think there was anything wrong with it, I just don't think it is the right fit to match the stock spec.

OEM left, BBB center, Lares right. The Lares looks completely different, while the other two are pretty similar to each other.
IMG_5240.JPEGIMG_5241.JPEG
 
Busy weekend ahead. Should be out of work early tomorrow and with Monday off, I should be able to accomplish 3.5 days of work. I’m supposed to receive the new u-bolt plates Saturday, the OEM steering gear arrives tomorrow, and the Curt towing hitch arrived today.

The rear axle is painted, and so I’m hoping to build it up and swap it in, change the Speedo gear, drop the rear bumper and gas tank to work on some stuff back there and install the tow hitch and bumperettes, install the spring plates to fix the sway bar links, and replace the steering gear with OEM for perfect stock steering feel.

Lots to do and it will check a lot of stuff off of the list.