1995 Sahara project

The interior needed some freshening up as the door panels were bleached quite a bit from the sun. The new rebuilt manual tilt column was black that I pulled from the yard and the center dash bezel was damaged. The center gauge panel was also damaged and none of them worked. I ordered a used replacement from Ebay that was in great condition and thankfully, in good working order.

I should have taken more detailed photos of the overall condition when I purchased it but I wasn't really thinking about it at that time.

20230912_153508.jpg


20230912_153451.jpg


It also came with the original center console that was also badly faded and somewhat broken.

20240410_163414.jpg
20240410_163427.jpg

20240410_163435.jpg


Luckily it wasn't bad overall. I hadn't intended to use it originally but then decided I'd like to reinstall it. It was easy to disassemble and clean up/paint with SEM Camel.

The dash pad was in good shape and just needed a good cleaning. The gauge cluster, center gauge cluster, new steel glove box vault and steering column I painted painted with SEM Camel as well. It's such a damn good match for the original Spice color. I cleaned up the horn button as best as I could along with treating the leather on the wheel. Looks much better than it did. The seats also cleaned up well with a nice carpet machine.

20240428_120132.jpg
20240428_120142.jpg
20240428_120149.jpg
20240428_120157.jpg
20240428_120216.jpg
20240428_120226.jpg
20240428_120240.jpg


The back seat was included and also in good condition but I don't plan to use so It's being stored with the carpets for now.

20240428_120257.jpg


I kept the manual shifter from my old 91 Wrangler, the shifter boot I got from a YJ at the junkyard, the rubber was soft and in good shape and cleaned up well. I modified the automatic trans tunnel cover to fit the manual shifter and then painted it a new coat of black (it's covered in sand after being down to the beach several times that week). You'd never tell it wasn't a manual transmission from the factory at this point.

20240428_120247.jpg
 
The door mirrors and wipers were in pretty rough shape as well. Spent some time cleaning them up and removing the corrosion that had them seized up tight. SEM Trim black makes them look like factory new again along with some Rustoleum matte clear.

20240327_150442.jpg


20240327_150402.jpg


20240328_205800.jpg


Up next is restoring the Sahara decals. This Jeep is far from mint but it's a solid driver. Somewhere along the line a PO removed the pin striping. The remaining Sahara logo, Jeep and Wrangler decals are faded and peeling, etc. I want to restore them to looking nice again. It's funny, I am not typically a pin stripe guy on vehicles but for some reason, I do like how the Sahara came with them from the factory and I want to put them back on.

20240426_171657.jpg

20240503_211738.jpg


I ordered the green/spice Sahara decal set from Phoenix Graphics and will be tackling this next.

20240503_211653.jpg
 
  • Like
Reactions: machoheadgames
you have really done some good work. the dash, mainly glovebox and radio is different than from my 95. are they from a 95 or another year jeep.
 
you have really done some good work. the dash, mainly glovebox and radio is different than from my 95. are they from a 95 or another year jeep.
Thank you. The glove box is an aftermarket "vault" style steel glove box that locks. I think it was a Smittybuilt or something. It is powdercoated black and I decided to paint most of it with the Sem Camel to match better with the rest of the dash. The radio I just bought, it's just a JVC bluetooth am/fm receiver. I stream music from my phone so it works great.
 
Does the SEM Camel match the existing Spice parts in the dash as well as the photos appear? Or did you just spray everything?
 
Does the SEM Camel match the existing Spice parts in the dash as well as the photos appear? Or did you just spray everything?
It's a pretty close match. I'd say like 98% maybe? If you look at the dash picture, the steering wheel, horn button, top dash pad and the metal dash frame are all still original. The two gauge clusters, glove box, door panels and center console are all painted SEM Camel and then Rustoleum matte clear. It's a pretty damn good match overall.
 
It's a pretty close match. I'd say like 98% maybe? If you look at the dash picture, the steering wheel, horn button, top dash pad and the metal dash frame are all still original. The two gauge clusters, glove box, door panels and center console are all painted SEM Camel and then Rustoleum matte clear. It's a pretty damn good match overall.
I’m curious how you managed to paint around the windows so cleanly? I was discussing with someone I wanted to have paint my panels for me (he does it all the time) and he said he pretty much won’t do it unless it’s all one color because he won’t be satisfied at his ability to cleanly paint the windows at the border. I’m considering doing it all one color but I really like the factory contrast and would prefer to stick to that scheme if possible.
 
It was a nice day in Daytona today, a good day to be out in the garage. I wanted to get these vinyls done today. Overall it went pretty smoothly. Trying to get all the segments lined up straight and even with each other was definitely working my OCD lol. I am happy with the outcome and it's looking a lot better than than with the old and faded decals.


Taping out a couple of references

20240505_133941.jpg
20240505_133956.jpg

20240505_134411.jpg
20240505_140340.jpg
20240505_140649.jpg


Looking much better.....

20240505_143955.jpg


20240505_144002.jpg
20240505_152558.jpg


Driver side all done.

20240505_153457.jpg

20240505_154512.jpg


You can see how faded the Sahara vinyls are, the green is gone and the spice is faded and spotted.

20240505_154518.jpg

20240505_155421.jpg
20240505_155623.jpg
20240505_195101.jpg


Looking pretty good. I already have a set of new fender flares that I'll get painted to match at some point. I want it to look good but I also like to have fun with it so I won't be going crazy. The paint cleaned up pretty well with some paint correction and buffing but it has plenty of scrapes, nicks and a few dents. After tearing it apart and having it in pieces for about 8 months, I am looking to enjoying it more often.
 
  • Like
Reactions: machoheadgames
I’m curious how you managed to paint around the windows so cleanly? I was discussing with someone I wanted to have paint my panels for me (he does it all the time) and he said he pretty much won’t do it unless it’s all one color because he won’t be satisfied at his ability to cleanly paint the windows at the border. I’m considering doing it all one color but I really like the factory contrast and would prefer to stick to that scheme if possible.
Around the windows?
 
The dark sections for gauges. Curious how you managed to paint the spice around them cleanly. It’s weird to tape it off properly….or at least I and the guy who does this work a lot thought so
Oh gotcha. I used blue painters tape and my thumbnail to burnish the edges around the black bezels. Then an x-acto hobby razor to cut around that shape. It worked pretty well. I think my lines are cleaner than they were from Chrysler. I've had a lot of years of painting R/C car bodies, models, etc. and am pretty good with taping out and painting. The SEM lays down so nicely as well so that is a big help. Giving it a light mist first to seal in the tape edges, really keeps you from getting bleeds under the tape. I'll look back and see if I took pics when I painted them but I don't think I did.

Here is an up close shot

436798339_1641219896644207_509785809059090760_n.jpg
 
Oh gotcha. I used blue painters tape and my thumbnail to burnish the edges around the black bezels. Then an x-acto hobby razor to cut around that shape. It worked pretty well. I think my lines are cleaner than they were from Chrysler. I've had a lot of years of painting R/C car bodies, models, etc. and am pretty good with taping out and painting. The SEM lays down so nicely as well so that is a big help. Giving it a light mist first to seal in the tape edges, really keeps you from getting bleeds under the tape. I'll look back and see if I took pics when I painted them but I don't think I did.

Here is an up close shot

View attachment 122981
Turned out really nice. Wanna do some more? :ROFLMAO:
 
Turned out really nice. Wanna do some more? :ROFLMAO:
lol I wouldn't mind at all, if you were closer. I grabbed the original bezel that came with my Sahara, it was damaged so I used the one from my old Jeep which was black. Just wanted to show you how I taped it out. You could use a burnishing tool but I just use my fingernail and there is a nice groove around the gauge windows. Then I use a hobby x-acto to trim them out and they come out nice and clean.

436886647_359782717096445_3048887015031209507_n.jpg
436924624_405536599072437_808027788038126803_n.jpg
436859034_355625973709562_4657052372665641514_n.jpg
436834536_910648197527093_3664703269710675298_n.jpg


Since they were black originally, I just left the bezel area black and painted the rest spice. I would have kept this original piece as the one I used had the radio area trimmed already but this one is damaged in a few spots. Not sure what the PO did lol but something hit it and a couple of the gauges were busted as well when I got it. A good couple of light mist coats gets the edges nice and sealed and then a couple of heavier coats to get it done. Then I removed the tape and matte cleared the whole piece.
 
  • Like
Reactions: machoheadgames
I might have to try that method in reverse; there’s a bit of Spice overspray onto the black that would be nice to clean up someday.
IMG_2729.jpeg
IMG_2730.jpeg
 
I might have to try that method in reverse; there’s a bit of Spice overspray onto the black that would be nice to clean up someday.
View attachment 122992View attachment 122993
It would definitely work in reverse. Easy to remove the gauge panels and then just tape them out the same way, cut them and peel away the centers. I actually need to do the same on my tach/speedo panel as the tach has an area like that where the black paint is worn away and needs to be sprayed black.
 
I still have a few things I need to get fixed on this YJ but it's been running great now since the rebuild. I have over 1k miles on it since and it's been great to just hop in it and go after having it torn apart for the first 8 months I have owned it.

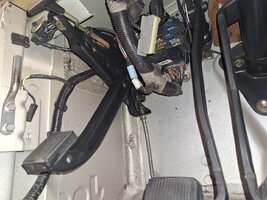
The e-brake has never worked since I bough this Sahara (I know, big shocker). I have researched this issue and found that many people who had the recall repair complained that it didn't last long and wound up failing again. I also looked online and found replacement pedal assemblies for about 75 bucks. I would prefer to keep OEM parts over buying new Chinese stuff when at all possible so I decided to pull the e-brake pedal assembly and see if I could fix the problem.

My e-brake would not set, when you pushed the pedal, it just came right back up. On occasion it would catch but it would release almost immediately. This sounded like the same problem most have. Upon inspection I discovered that the mechanism was all in tact but the teeth at the top of the pedal arm were gummed up with ancient grease and grime/grit/dirt. The "pin" that is spring loaded and sits in the teeth to hold the pedal would barely move from being basically stuck in place. I used a pick to move it and the mechanism seemed to work fine when I pushed it in and out and would hold the pedal in whichever tooth it was pushed to.

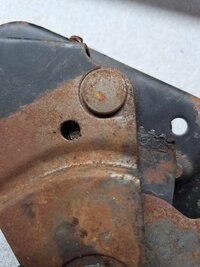
448139653_1768907083638580_7831678611053603038_n.jpg

In that little hole is where the pin rests in the teeth. I used a bunch of PB blaster and cleaned out all the old hard grease and gunk out of that area.

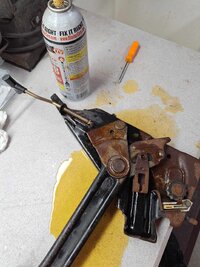
448158916_993976968838076_7841862460530208587_n.jpg

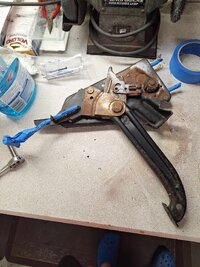
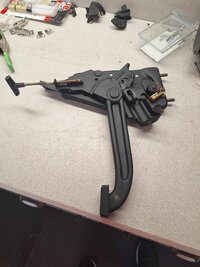
Once it was cleaned out in there, it seemed to return to normal operation. Great, saves me 75 bucks. While I have it out, I had to clean it up and paint it of course since I cleaned up and painted the other pedal arms when I was doing the swap.

448636116_885198256961511_5143099236527331781_n.jpg

448120449_505688158457853_4147765620656435168_n.jpg

I cleaned up the brake switch, added dielectric grease, etc. while I had it out. Re-installed the assembly, set the tension and was happy that it all works like it should.

448308428_486084930666999_801234325015983969_n.jpg

Good to have a working e-brake in this vehicle again. Talking back and forth with machoheadgames we were both thinking that maybe the fact that this Jeep has been an auto transmission for the last 28 years that maybe the e-brake wasn't used much. Hence why it is in good shape and not worn out and just needed some cleaning. It will certainly be put to use now. Got tired of not being able to leave it running in the driveway lol.
 
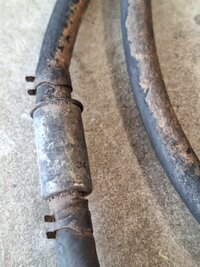
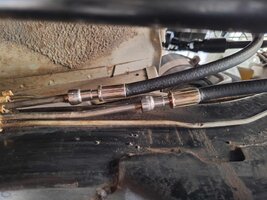
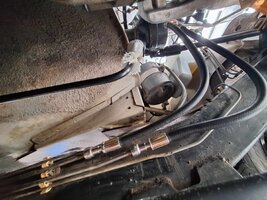
One of the first things I tackled with this Jeep was the fuel system. I didn't take pics of the original work I did because I didn't realize I'd be doing a build thread back then. I dropped the tank and cleaned it out (which was needed, it had a bunch of grit and crap along the bottom of it) and replaced ALL of the rubber hoses. I also replaced the roll over valves, sending unit and fuel pump and filter. The hard lines looked good so I left them be. The only area I haven't touched was the lines from the frame hard lines up to the fuel injector rail. The rubber on those looks pretty bad, very dry rotted and crumbling. I've known I wanted to replace them but honestly, kept forgetting about it.

I saw a couple of videos recently of two YJ's burning to the ground due to bad lines leaking under pressure to the exhaust. I thought, after all this work I have put into this thing, it would be pretty dumb to let that happen.

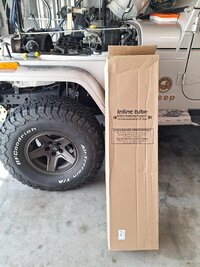
I had wrestled with making some custom lines out of braided line and using AN fittings but I finally settled on a more OEM setup from Inline Tube. I have used them before for brake line replacements and have always been satisfied. I haven't moved the Jeep in a few weeks as I have been busy but finally got some time this afternoon to swap out the lines.

450962897_494418819738053_8423430439482473851_n.jpg

450689068_354752404334881_7831700261217846182_n.jpg

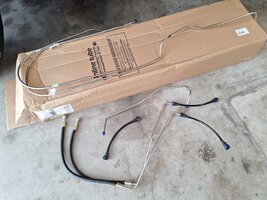
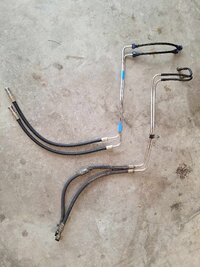
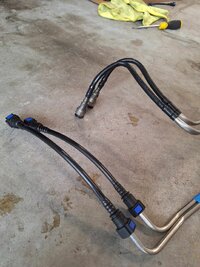
They don't sell just the two rubber/hard lines for the fuel rail so I had to purchase both the supply and return kits which includes all the hard lines. Again, my hard lines are in good shape so I see no reason to swap them out. I'll hang on to these for the future, just in case.

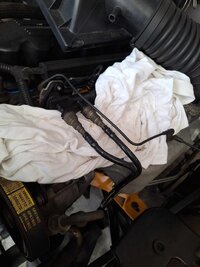
Pretty easy swap here, just remove the air box for better access. Relieve pressure at the rail valve and disconnect the two lines.

448980288_1904725606670227_3264222341852315690_n.jpg

451253864_3394983533968015_6735781813093898218_n.jpg


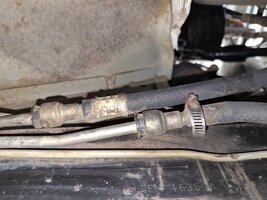
Then disconnect the two at the bottom. These were a little more of a pain as they were crammed with dirt, so had to work on them a little bit. Make sure you pay attention to which line is the return and supply. I took a pic for reference because I know I'd forget what went where.

449324140_933349875225669_6612260367346902902_n.jpg

You can see the PO tossed in some small fuel filter. I am sure that thing is all crammed up with Junk.

450854206_449938034508614_4509097785924969544_n.jpg

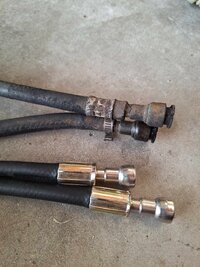
Comparison of the new lines vs. old.

448987612_1198525011394886_3590353600550595865_n.jpg

450861335_1935386450254620_5521121420855214196_n.jpg

450962561_1024315602000891_2657852523069669178_n.jpg

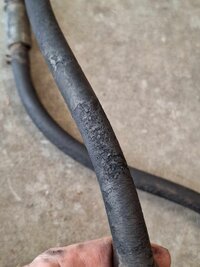
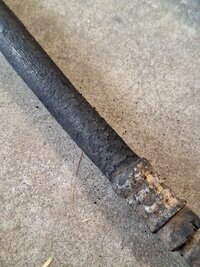
Close ups of how bad the oem lines are. Very dry rotted and cracked, also close up of the little fuel filter that was installed previously.

450417711_1163612771564375_1639248623543777889_n.jpg

450362659_462356810015364_4146538327025556068_n.jpg

448974456_443059295383652_4265467265899807_n.jpg
 
  • Like
Reactions: machoheadgames
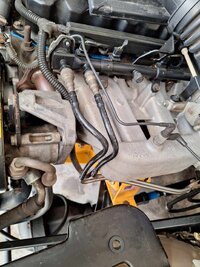
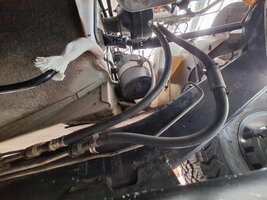
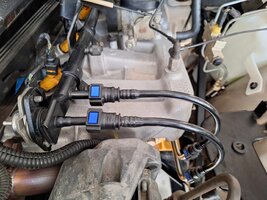
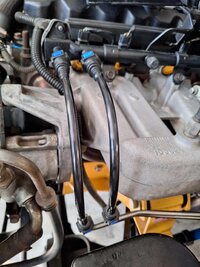
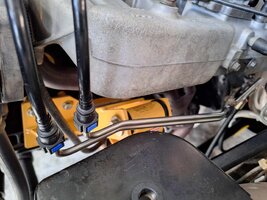
New lines are installed. Easy job over all. I cleaned up the hard line ends along the frame under the Jeep. The toughest part was getting the little bracket that holds them to the intake manifold back in position.

451036137_393111543318753_5764013407028943182_n (1).jpg

450277098_988045803102782_8722467318140575456_n.jpg

449005813_500428739055251_8469405526667242008_n.jpg

451758682_1076102020546189_2253556508396258548_n.jpg

450404422_858328162324880_7390817066091503561_n.jpg

Glad to finally get this done. I should have done it when I first replaced the rest of the fuel system. It's been more concerning lately and then I saw both those videos and got off my butt and ordered the parts. I carry a fire extinguisher in the Jeep but it's good peace of mind to know the whole fuel system is now in good shape.

Most of this YJ is in good shape now. Not sure what the next project will be. I do have another set of axles I want to swap in (Ford 8.8) that will also re-gear it to 4.10. But I need to pick up a welder and get to learning on that so that one will be awhile.

Got some other little things to address but overall, just enjoying driving this thing. Puts a smile on my face everytime.