1995 Sahara project

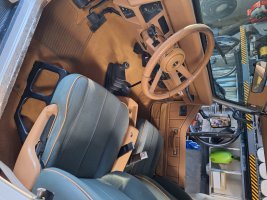
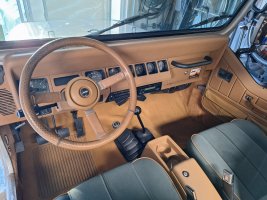
The interior needed some freshening up as the door panels were bleached quite a bit from the sun. The new rebuilt manual tilt column was black that I pulled from the yard and the center dash bezel was damaged. The center gauge panel was also damaged and none of them worked. I ordered a used replacement from Ebay that was in great condition and thankfully, in good working order.

I should have taken more detailed photos of the overall condition when I purchased it but I wasn't really thinking about it at that time.

20230912_153508.jpg


20230912_153451.jpg


It also came with the original center console that was also badly faded and somewhat broken.

20240410_163414.jpg
20240410_163427.jpg

20240410_163435.jpg


Luckily it wasn't bad overall. I hadn't intended to use it originally but then decided I'd like to reinstall it. It was easy to disassemble and clean up/paint with SEM Camel.

The dash pad was in good shape and just needed a good cleaning. The gauge cluster, center gauge cluster, new steel glove box vault and steering column I painted painted with SEM Camel as well. It's such a damn good match for the original Spice color. I cleaned up the horn button as best as I could along with treating the leather on the wheel. Looks much better than it did. The seats also cleaned up well with a nice carpet machine.

20240428_120132.jpg
20240428_120142.jpg
20240428_120149.jpg
20240428_120157.jpg
20240428_120216.jpg
20240428_120226.jpg
20240428_120240.jpg


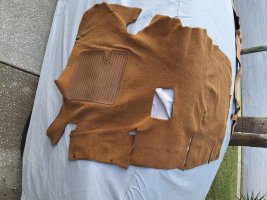
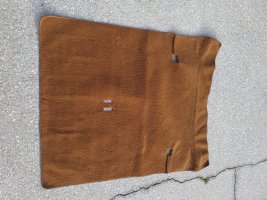
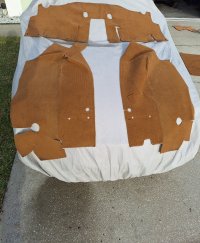
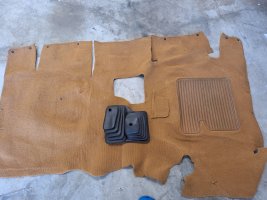
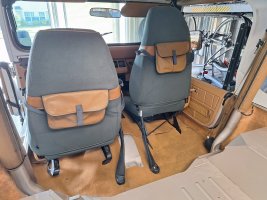
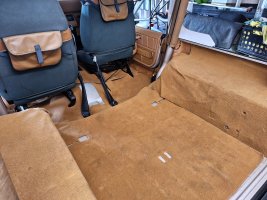
The back seat was included and also in good condition but I don't plan to use so It's being stored with the carpets for now.

20240428_120257.jpg


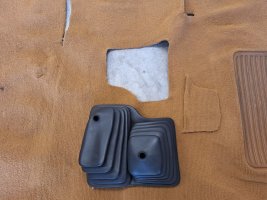
I kept the manual shifter from my old 91 Wrangler, the shifter boot I got from a YJ at the junkyard, the rubber was soft and in good shape and cleaned up well. I modified the automatic trans tunnel cover to fit the manual shifter and then painted it a new coat of black (it's covered in sand after being down to the beach several times that week). You'd never tell it wasn't a manual transmission from the factory at this point.

20240428_120247.jpg
 
The door mirrors and wipers were in pretty rough shape as well. Spent some time cleaning them up and removing the corrosion that had them seized up tight. SEM Trim black makes them look like factory new again along with some Rustoleum matte clear.

20240327_150442.jpg


20240327_150402.jpg


20240328_205800.jpg


Up next is restoring the Sahara decals. This Jeep is far from mint but it's a solid driver. Somewhere along the line a PO removed the pin striping. The remaining Sahara logo, Jeep and Wrangler decals are faded and peeling, etc. I want to restore them to looking nice again. It's funny, I am not typically a pin stripe guy on vehicles but for some reason, I do like how the Sahara came with them from the factory and I want to put them back on.

20240426_171657.jpg

20240503_211738.jpg


I ordered the green/spice Sahara decal set from Phoenix Graphics and will be tackling this next.

20240503_211653.jpg
 
  • Like
Reactions: machoheadgames
you have really done some good work. the dash, mainly glovebox and radio is different than from my 95. are they from a 95 or another year jeep.
 
you have really done some good work. the dash, mainly glovebox and radio is different than from my 95. are they from a 95 or another year jeep.
Thank you. The glove box is an aftermarket "vault" style steel glove box that locks. I think it was a Smittybuilt or something. It is powdercoated black and I decided to paint most of it with the Sem Camel to match better with the rest of the dash. The radio I just bought, it's just a JVC bluetooth am/fm receiver. I stream music from my phone so it works great.
 
Does the SEM Camel match the existing Spice parts in the dash as well as the photos appear? Or did you just spray everything?
It's a pretty close match. I'd say like 98% maybe? If you look at the dash picture, the steering wheel, horn button, top dash pad and the metal dash frame are all still original. The two gauge clusters, glove box, door panels and center console are all painted SEM Camel and then Rustoleum matte clear. It's a pretty damn good match overall.
 
It's a pretty close match. I'd say like 98% maybe? If you look at the dash picture, the steering wheel, horn button, top dash pad and the metal dash frame are all still original. The two gauge clusters, glove box, door panels and center console are all painted SEM Camel and then Rustoleum matte clear. It's a pretty damn good match overall.
I’m curious how you managed to paint around the windows so cleanly? I was discussing with someone I wanted to have paint my panels for me (he does it all the time) and he said he pretty much won’t do it unless it’s all one color because he won’t be satisfied at his ability to cleanly paint the windows at the border. I’m considering doing it all one color but I really like the factory contrast and would prefer to stick to that scheme if possible.
 
It was a nice day in Daytona today, a good day to be out in the garage. I wanted to get these vinyls done today. Overall it went pretty smoothly. Trying to get all the segments lined up straight and even with each other was definitely working my OCD lol. I am happy with the outcome and it's looking a lot better than than with the old and faded decals.


Taping out a couple of references

20240505_133941.jpg
20240505_133956.jpg

20240505_134411.jpg
20240505_140340.jpg
20240505_140649.jpg


Looking much better.....

20240505_143955.jpg


20240505_144002.jpg
20240505_152558.jpg


Driver side all done.

20240505_153457.jpg

20240505_154512.jpg


You can see how faded the Sahara vinyls are, the green is gone and the spice is faded and spotted.

20240505_154518.jpg

20240505_155421.jpg
20240505_155623.jpg
20240505_195101.jpg


Looking pretty good. I already have a set of new fender flares that I'll get painted to match at some point. I want it to look good but I also like to have fun with it so I won't be going crazy. The paint cleaned up pretty well with some paint correction and buffing but it has plenty of scrapes, nicks and a few dents. After tearing it apart and having it in pieces for about 8 months, I am looking to enjoying it more often.
 
  • Like
Reactions: machoheadgames
I’m curious how you managed to paint around the windows so cleanly? I was discussing with someone I wanted to have paint my panels for me (he does it all the time) and he said he pretty much won’t do it unless it’s all one color because he won’t be satisfied at his ability to cleanly paint the windows at the border. I’m considering doing it all one color but I really like the factory contrast and would prefer to stick to that scheme if possible.
Around the windows?
 
The dark sections for gauges. Curious how you managed to paint the spice around them cleanly. It’s weird to tape it off properly….or at least I and the guy who does this work a lot thought so
Oh gotcha. I used blue painters tape and my thumbnail to burnish the edges around the black bezels. Then an x-acto hobby razor to cut around that shape. It worked pretty well. I think my lines are cleaner than they were from Chrysler. I've had a lot of years of painting R/C car bodies, models, etc. and am pretty good with taping out and painting. The SEM lays down so nicely as well so that is a big help. Giving it a light mist first to seal in the tape edges, really keeps you from getting bleeds under the tape. I'll look back and see if I took pics when I painted them but I don't think I did.

Here is an up close shot

436798339_1641219896644207_509785809059090760_n.jpg
 
Oh gotcha. I used blue painters tape and my thumbnail to burnish the edges around the black bezels. Then an x-acto hobby razor to cut around that shape. It worked pretty well. I think my lines are cleaner than they were from Chrysler. I've had a lot of years of painting R/C car bodies, models, etc. and am pretty good with taping out and painting. The SEM lays down so nicely as well so that is a big help. Giving it a light mist first to seal in the tape edges, really keeps you from getting bleeds under the tape. I'll look back and see if I took pics when I painted them but I don't think I did.

Here is an up close shot

View attachment 122981
Turned out really nice. Wanna do some more? :ROFLMAO:
 
Turned out really nice. Wanna do some more? :ROFLMAO:
lol I wouldn't mind at all, if you were closer. I grabbed the original bezel that came with my Sahara, it was damaged so I used the one from my old Jeep which was black. Just wanted to show you how I taped it out. You could use a burnishing tool but I just use my fingernail and there is a nice groove around the gauge windows. Then I use a hobby x-acto to trim them out and they come out nice and clean.

436886647_359782717096445_3048887015031209507_n.jpg
436924624_405536599072437_808027788038126803_n.jpg
436859034_355625973709562_4657052372665641514_n.jpg
436834536_910648197527093_3664703269710675298_n.jpg


Since they were black originally, I just left the bezel area black and painted the rest spice. I would have kept this original piece as the one I used had the radio area trimmed already but this one is damaged in a few spots. Not sure what the PO did lol but something hit it and a couple of the gauges were busted as well when I got it. A good couple of light mist coats gets the edges nice and sealed and then a couple of heavier coats to get it done. Then I removed the tape and matte cleared the whole piece.
 
  • Like
Reactions: machoheadgames