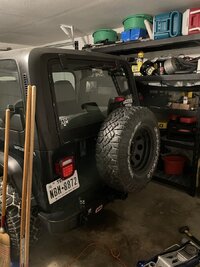
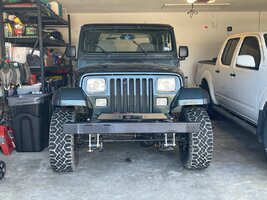
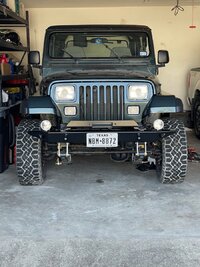
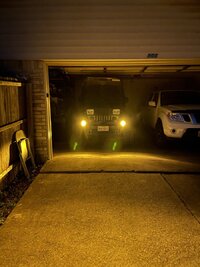
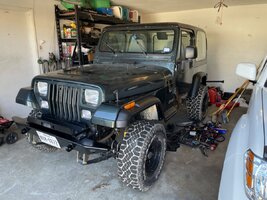
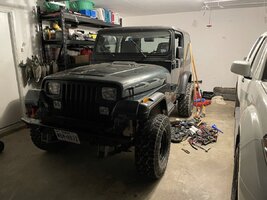
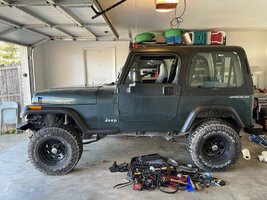
My '94 Hunter Green “No Compromises" Build

New Wheels!

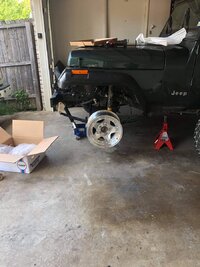
My parents are aware of the increased efforts I've been making to improve the YJ and get it to be fun to drive again. I had mentioned that I wanted to buy wheels to them, and when my birthday came, they kindly gave me a combined Christmas and birthday to go and buy them. Sweet!

After years and years of debating which tires to go with, how high of lift, what size tires, what wheels, what size wheels, etc, I was set on Fuel Anzas in the 15x8 size. However, I found some reviews that weren't so great, and learned about how they can rust from all the fake beadlock bolts. I know of one guy who removed all the bolts on his, retapped the holes deeper, then installed stainless bolts. Cool idea, but that's a lot of work for $200 wheels....I reevaluated my build plan, and after seeing a build thread by "JamesandtheSahara" on the TJ forum, decided I wanted the American Racing AR23 wheels.

I decided I'm going with 33's as my max tire size and with them, I'm going skinny. I decided on BFGoodrich KO2s in 33x10.5R15 size, and 15x7 rims. When I received the money on my birthday, I made the order and went to pick them up at Summit Racing in Arlington that day.

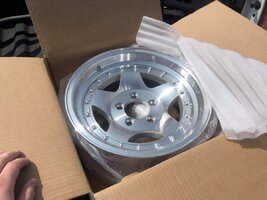
A fresh rim in the box...
IMG_1852.JPG

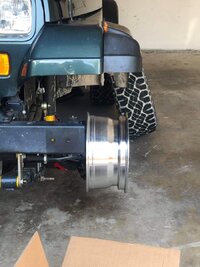
After testing these real quick, I think they will look awesome!
IMG_1850.JPGIMG_1849.JPG

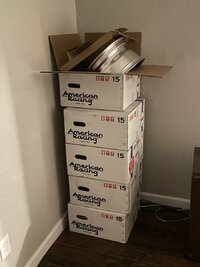
Leaning tower of rims patiently waiting for me to buy tires...
IMG_1872.jpeg

Currently I'm working on buying the 15" Vanco Big Brakes, and complete replacement steering linkage. As soon as I have those, tires will be next. My logic is that I can still drive it on the current tires, so it's not a real rush. It is definitely something I want to get done sooner rather than later though.
 
  • Like
Reactions: Fouledplugs
Tail Lights, License Plate, and Fuel Filler Bezel

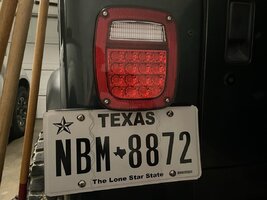
After much debate in my head, I decided I didn't want to run the Savvy tail lights anymore. I didn't like having to run license plate light wiring out to the tire carrier, and I had a new bumper waiting to be installed and I planned to redo the wiring to it, and really didn't feel like it. I was going to basically create a second third brake light housing on the tailgate for the connections to be made, but decided I'd rather swap tail lights and move the plate back to stock.

I ordered the:

-Quadratec LED Tail Light Kit
-Kentrol Black Stainless Fuel Filler Bezel
-Omix-Ada License Plate Bracket

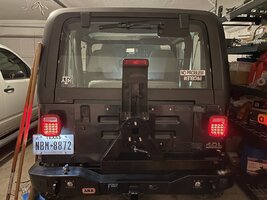
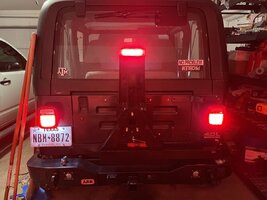
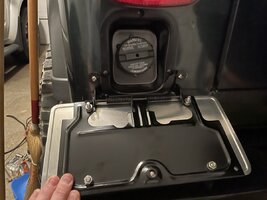
All three of these exceeded my expectations. It's rare that I'm pleased by Omix Ada but all of these parts were top notch, especially the tail lights. They are a super clean cherry red and very bright and eye catching. The Kentrol fuel bezel was much nicer than the stock plastic one, and the plate bracket works perfectly and was a nice powder coat black.

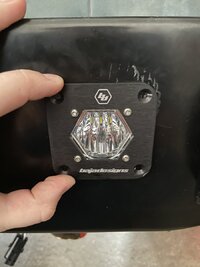
The backup lights did leave a bit to be desired on the Quadratec tail lights. They are not near as bright as the Savvy's were. However, the brake lights are noticeably brighter than Savvy, so it's one of those 6 of one, half dozen of the other things. Pros and cons, both are excellent and the Quadratecs definitely suited my needs better since they let the plate stay in the same spot, and illuminate it brilliantly. The lack of backup light power on the Quadratecs was enough that I decided to install Baja Designs S1 Lights in my bumper, which is in the next post.

Here are some pics and a video in action...

IMG_1918.JPEG

IMG_1919.JPEG

IMG_1925.JPEG

IMG_1926.JPEG

The video isn't great, it makes one light look brighter but in person it's not like this at all. They are very nice quality lights.

 
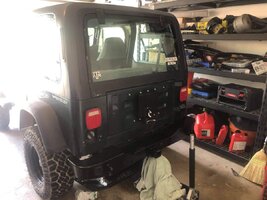
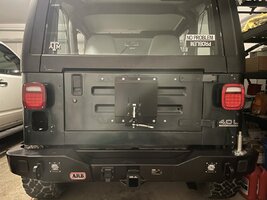
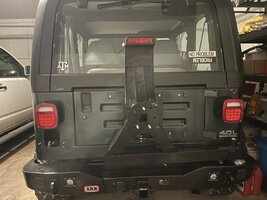
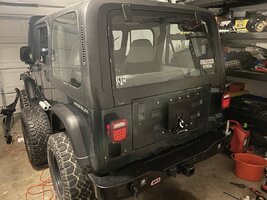
ARB Modular Rear Bumper & Tire Carrier (with extras)

This project was a BIG one. I started in October and am STILL not done with it fully. I have also had some hiccups and worked really slowly, so it's not a surprise.

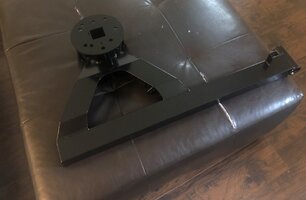
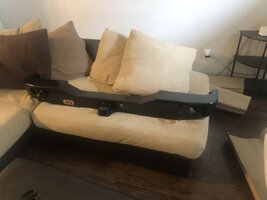
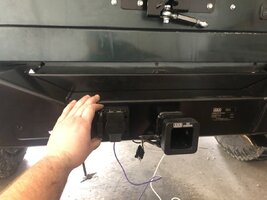
After all the mess with other tire carriers and bumpers, I decided I was done dealing with BS. I always dismissed this bumper because of the price, and it definitely is a high price, no debating that. But after analyzing the options, it was pretty much between this one and the Warn rear bumper/carrier. Part of the reason I wanted this one was because I really liked all the surface area it provides. I've always hated the way towing connectors are on Jeeps: typically just a 4-way plug dangling off the back. I wanted to do it better, so I got a Hopkins combo 4-way and 7-way plug from Walmart, and wired it into the Jeep wiring. I also wanted better backup lights than the Quadratec LEDs provided, so I purchased Baja Designs S1 Flush Mount. I eventually got over the price and decided to order it. It was backordered and took about 6 weeks to arrive. Felt like an eternity!

Upon opening it, you immediately see how nice it is, and it was also extremely well packaged:

IMG_0159.jpegIMG_0160.jpeg

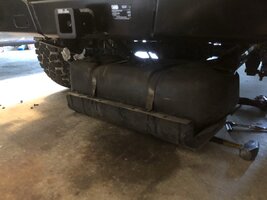
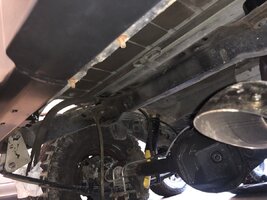
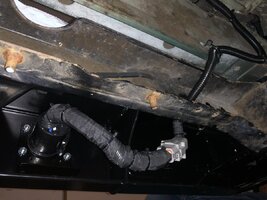
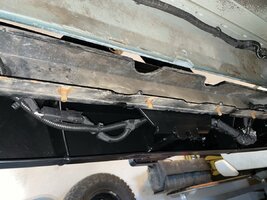
With any rear bumper install on a Jeep, it is an utter pain to deal with the bolts with the gas tank installed, so I opted to drop the gas tank. I also needed to do this anyways so I could access all the rear wiring to tie into the backup lights and to integrate my towing harness wires. It wasn't too bad, I had to loosen the exhaust, disconnect the fuel fill/vent hoses, and then easily lower it down. It came right out.

IMG_0952.jpeg

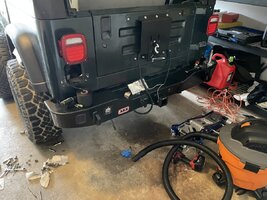
The required drilling a few holes in the frame and self tapping a few holes on the side of the frame for brackets that reinforce the strength of the rear crossmember for towing. After getting the holes made, I got it mounted up. At this point I still had the Savvy lights even, I hadn't decided yet if I wanted to go with the QT LEDs and move the plate back.

IMG_1848.JPG

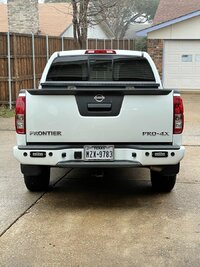
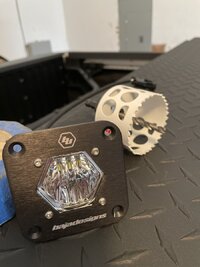
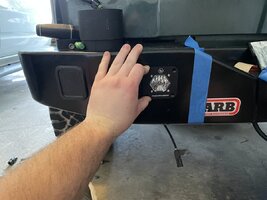
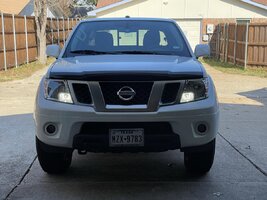
After recess mounting a tow connector and bright Rigid backup lights on the bumper of my 2019 Nissan Frontier, I decided doing the same to the Jeep was an absolute must. The Rigid SRQ backup lights were a real pain to cut holes for on the truck, so I opted for a simpler install on the Jeep. For that reason, I chose the Baja Designs S1 Flush Mounts, which utilize a 2.5" hole saw. It doesn't get easier than that. I also picked up another of the same tow connector which is installed with a 2-1/8" Hole saw.

Don't those Rigids look badass?? They sure light up the night in reverse...

IMG_1630.jpeg

After buying the lights and tow connector, I began working on getting them installed and wired. It sure is easier to work in this area with the tank gone...

IMG_0953.jpeg

Figuring out the placement of the tow connector

IMG_1056.jpeg

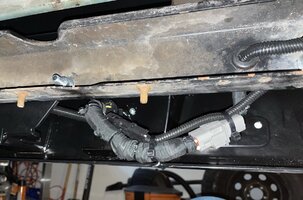
Doing some wire surgery after freeing the harness clips and pulling the loom up into the tub

IMG_0955.JPG

IMG_1003.jpeg

Routing my new tapped trailer wires down through the frame and to their home

IMG_1005.jpeg

IMG_1040.jpeg

Similar to the heater blower motor, I opted to use a Deutsch DT connector. I used an 8-pin plug and populated 5 of the possible 7 trailer wires: backup, left turn/brake, right turn/brake, tail lamp, and ground. If I ever need to install a 12V or trailer brake hookup, I can easily go back and add them.

IMG_1099.jpeg

Baja Designs Install

As stated, these are a simple 2.5" hole saw install.

62776584583__9A017B76-CEA6-4D2B-9AAF-4529553691BC.jpg

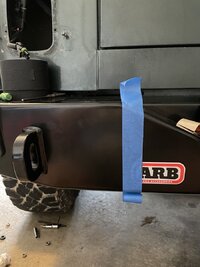
Masking off the area to help locate where they'll go...

IMG_0311.jpg

IMG_0314.jpg

IMG_0315.jpg


One Light Done!

IMG_0316.jpgIMG_0317.jpg


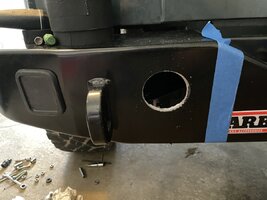
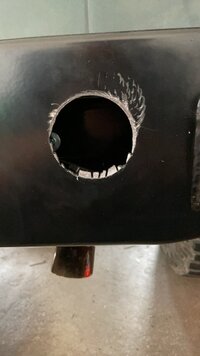
Had an oopsie with the second light....I used the wrong hole saw (accidentally picked up the 2-1/8 from the tow connector)...ended up having to double up the hole saws to enlarge to 2.5" and I slipped multiple times, making these marks.

IMG_0588.JPG


IMG_0589.jpg


Wiring nicely strung out and tied up within the bumper so as to be invisible out back.

IMG_0668.jpeg

IMG_0674.jpeg


Here are some final photos:

IMG_0614.jpeg

IMG_0616.jpeg

IMG_0615.jpeg

IMG_0600.jpeg

IMG_0765.jpeg

IMG_1920.jpeg

IMG_1921.jpeg

Overall I think it looks really good! It is a tad bulky, but I am not a rock crawler so it's fine. I love the added functionality of the hard mounted towing connector and the backup lights are much appreciated. This was an expensive project, but in my opinion was worth every bit.
 
Last edited:
Front Bumper, Fog Lights, Turn Signals, and Fender Flares

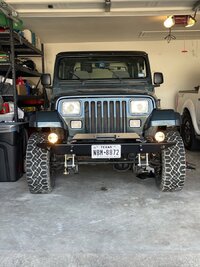
After doing so much to the rear of the Jeep, I wanted an easy front bumper project. I have always really loved the Warn front bumper, it is simple, classic, good quality, and plain gets the job done. It works well with their winch mount, their own winches, their own grille guard if I get it, and it has perfectly placed holes for lights and a license plate. I also used the Warn Winch Mount.

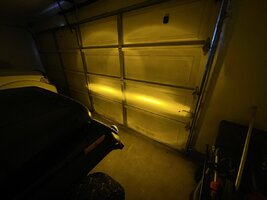
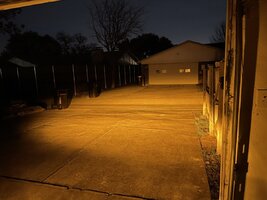
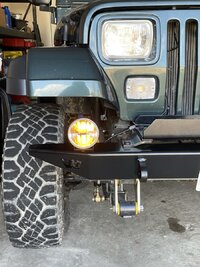
To go with the Warn front bumper, I also wanted a nice set of fog lights. For the fog lights, I wanted to be a bit unique. I decided to go with amber instead of white. With the planned JW speaker headlights eventually, I won't need extra white light. I opted for the KC Gravity G4 amber pair pack.

I LOVE the way it turned out. It looks super clean and as one of my buddies said, the new bumper makes the stock one look like a piece of train track...

Before...

IMG_1659.jpeg

After: with KC Fogs, Warn Bumper, and Winch Mount

IMG_1689.JPEG

IMG_1685.JPEG

IMG_1686.JPEG

Despite their small 4" size, these fogs are really impressive. They have an excellent cutoff, illuminate the ground very nicely, and look super cool being amber. I am so happy I went this route, it seriously transformed the look and function of my YJ.

IMG_1756.JPEG

IMG_1697.JPEG

IMG_1755.JPEG

Turn Signals

After much playing around with LED bulbs in amber housings, I decided to experiment with some clear front turn signal housings. If you recall my Nissan Frontier, it is modern looking (even though it's a 15 year old design - ha!) with clear front housings. To comply with DOT, all vehicles must have amber side reflectors up front, so the Frontier does. I decided that was a cool concept (clear front, amber sides) so I applied it to the Jeep. In 2019, I also ditched the LED headlights from 2017 and installed Hella H4 lights with 80W/100W bulbs. I wanted the clear housings to match those.

IMG_1666.JPEG

I've tried a lot of LED bulbs in the front housings and my favorite has to be the switchback LEDs from VLEDS. These are white as a running light, and then switch to an on-off amber blink when the turn signal is used. After signaling, they pause for a second, then flip back to amber. Much like the rear bumper setup, I've been running these on my Frontier which inspired me to do the same to the Jeep. I wired the white portion to come on with the key in the ignition as a DRL. I think it adds a cool look, especially when turning where one side is still white as the other blinks amber.

Here is the Frontier:

IMG_1476.jpeg

IMG_1462.jpeg


I think it looks awesome. I'm going the same route on the YJ.

After buying VLEDS switchbacks, here they are on the YJ:


I am going to wire them up as a white DRL like I did the truck. It's unique, not halos, makes me more visible and IMO, in a very cool modern way. Then you have the brilliant amber turn signal which definitely can't be missed.

While I was at it, of course to run LED front signals, I had to convert the side markers per @Steel City 06 drawing that he drew up a while back. I performed that mod and opted to use VLEDS 26-LED amber 194 bulbs. Inside the stock amber side markers, the output is awesome.


Fender Flares

After finally getting too tired of the wide 6" flares, I replaced them with the Crown stock replacement kit. They were very nice quality, and I love the look of being back to stock. with the 15x7 wheels, I'll actually stick out a bit less in the future too. I think it looks WAY better than it did before and I am really looking forward to the 33's and new wheels.

IMG_1672.JPEG

IMG_1668.JPEG

IMG_1673.JPEG


Overall I think all of these exterior mods bring the Jeep a really long way towards being a nice mix of modern, classic, and functional. I am really pumped over how it's turning out lately.
 
Steering Wheel and Gauge Clusters

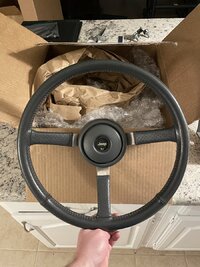
After always wanting a nicer wheel than stock but hating the aftermarket options, I opted to buy a super clean OEM leather wrapped charcoal wheel. It is basically pristine condition, super comfortable to hold, and so much better than my old one, which had become all sticky on the vinyl and I couldn't get it truly clean anymore...

IMG_0068.jpeg IMG_0067.jpeg

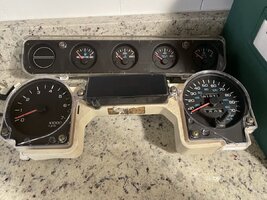
I also decided to buy new gauge cluster lenses after seeing another forum member do it. Real nice, no more hazy scratched plastic look!

IMG_1826.jpeg
 
  • Like
Reactions: Fouledplugs
Basically All New Fuel System

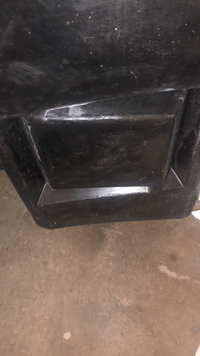
When I started the bumper project, as I stated earlier I needed to remove the gas tank to get to the wiring that runs across the backside of the Jeep, fastened to the underside of the tub. Over the years, my fuel tank level had become less accurate, especially on left turns. Left turns would severely mess with my fuel level reading. The plastic YJ tanks have always had some issues, mainly due to their fuel bowl which is riveted to the bottom of the tank. The purpose of the bowl is to hold fuel for the fuel pump to pull from, so that the pump doesn't starve and the Jeep doesn't sputter when you're off kilter or making turns, accelerating, braking, etc. Believed to be due to the ethanol in modern fuel, virtually all of these bowls warp and end up bending in such a way that they block the fuel sender float. It can hold the sender down (forcing the gauge to read low or E), push it up (forcing it to read full), or it can just interfere barely, but just enough to make the reading sporadic.

After dropping the tank, I pulled the fuel sender to see how my fuel bowl looked. Sure enough, it was quite warped. I opted to buy a new fuel tank. Pretty much the only new tank available for YJs is the 20 gallon version from MTS Company. I ordered it from Gas Tank Depot for a killer price. I received it in three days from FedEx. To go with it, I ordered new vent valves and grommets.

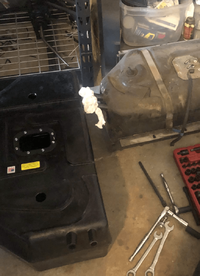
Here is the tank sitting next to the old one.

IMG_0685.PNG

Picture of the bottom of the tank. MTS tanks have the fuel bowl molded into the tank itself, so it isn't a part that can warp. This is a better design that should last for many years.

IMG_1940.PNG

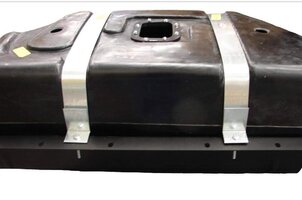
Buying the gas tank set me off on a downhill path of buying other parts, as these types of things usually do. To protect my tank, I wanted to go with a nice skid plate so I bought the Warn skid plate. Unfortunately, MTS makes their tank a bit larger than stock. They claim there are Jeeps that came with a tank that matches their own which is what they built the one they sell from. I have no idea, but my tank was definitely too tall for the Warn, and the straps wouldn't reach. I sent back the Warn. I looked at MTS website and they offered a skid plate, so I went to Gas Tank Depot and bought that one. It turned out to be a reboxed Warrior products skid. It wasn't as protective as the Warn, but it is indeed better than the stock skid and it did solve the height issue, so I'm fine with it. I opted for a new fuel tank mat from Detroit Muscle Technologies.

This is what the tank looks like inside the Warrior skid with the straps on. I don't have any pictures of mine.

IMG_1946.JPG

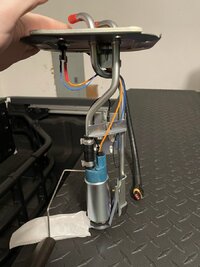
To go with the new tank/skid, of course I wanted a new sending unit as well. Who wants to put their nasty old sending unit in a nice new tank? No one. I ordered the MTS 20-gallon sending unit from you guessed it, Gas Tank Depot. I also ordered a new Bosch pump off of Amazon to keep as a spare. The MTS pump/sending unit has great reviews so I'm not too worried, but you never know.

Here is the sending unit and pump assembly waiting to go into the tank...

IMG_0040.JPEG

After I finished up with the bumper install, I got the tank up in place. I tried to install the filler hoses but ran into issues. Of course! The fuel filler and vent hoses wouldn't reach the new tank. At first I thought it was due to the body lift, but the body lift had been installed for a while on the old tank, so I figured that's probably not the issue. After some comparing, the issue came down to how the Warrior skid places the tank. It positions it further over to the right side of the Jeep. The tanks are about the same dimensions but with the new tank in the new skid, it was too far away and the hoses couldn't reach.

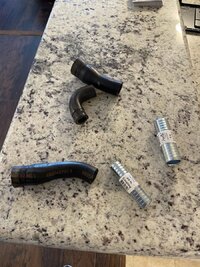
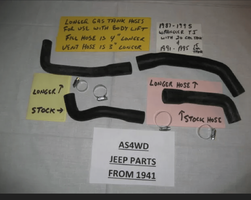
The only options at that point were to try and extend my old hoses, buy some new longer hoses if any were available, or go to a shop and have custom ones molded. I really didn't want to go the custom route because it is extra expensive and you're kinda screwed if you need new ones years later. First, I decided to try cutting and extending the hoses using pieces of 3/4" (for vent hose) and 1" (for filler hose) pipe from Lowe's.

Immediately after cutting the hoses, of course the pipes would not go in. They were too big, and the hoses had enough weird bends to them that there was no good straight portion to mate to the couplers anyways. Now, I had no hoses!

IMG_1947.jpeg

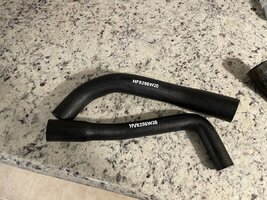
After some back and forth in my head, I decided to try an extended filler hose kit on eBay. These are more geared towards people with super tall body lifts, not so much moderate body lifts, but I figured with my tank placement being further away, and the body lift, they just may work.

IMG_0675.PNG IMG_0861.JPEG

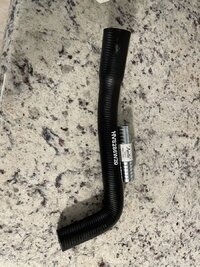
The hoses ended up being really long, and of course, too long for me to use as they were shipped. I was able to chop enough off each end of both hoses, and I cut and removed some section of the straight portion on the vent hose, and coupled it back together with the 3/4" extension I had purchased from Lowe's originally.

IMG_0862.JPEG

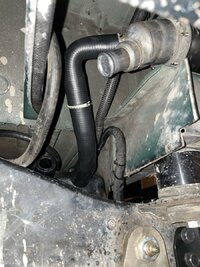
After all the doctoring of the hoses, I managed to get them onto the Jeep with no kinking.

Vent hose cut and spliced back...

62950599192__235864CC-7C5C-4849-B1F7-7A1A78D04395.JPEG

Both Hoses in place...

IMG_0866.JPEG

Everything clamped together and rock solid!

62950820479__5E35FA37-2381-4FB6-B0BA-F77A154E8694.JPEG
 
Last edited:
Parking Brake Reinforcement

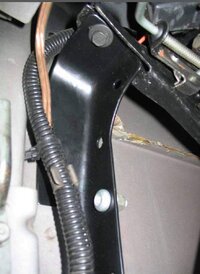
While doing some wiring up in the dash for a different project, I needed to unbolt the parking brake pedal from the dash to lower it down to the floor. After doing so, the upper bracket the parking brake bolts to fell out of the dash! apparently on the CJ7s and the YJs, the parking brake pedal upper support bracket was tack welded to the tub, and not done properly most of the time. Many of these brackets broke off, leaving owners with wobbly parking brake pedals that don't feel very secure. Honestly, I thought it was just how it was supposed to be.

After the mount fell out of my dash, I began searching to see if there was a decent fix for it. It turns out, Jeep released a TSB and a service package to fix the broken bracket. The part number for the kit is Mopar #CCUZB031. To those not aware, many YJs qualified for a parking brake pedal recall because many of the parking brake pedals would release themselves. When people brought their YJs in for repair, the technicians saw a lot of the upper brackets breaking off which is why the new kit was released. Also - parking brake pedals are still available under the recall. I have not gotten mine done but will eventually.

The CCUZB031 kit is very simple to install. All it consists of is a curved bracket that bolts to the tub, and then the parking brake bolts to it instead of the old broken off bracket. All necessary hardware is included. I bought this from eBay for $8. I originally bought it from Tasca Parts for $3, but they cancelled my order and said that you can't buy it unless you're a dealer performing a recall. I found one on eBay and ordered it.

Here is the kit:

IMG_1944.JPG

Here it is installed:

(On my Jeep)
IMG_1943.JPG

(Internet pic of someone else's Jeep)
IMG_1941.JPG

I recommend looking into this repair. The parking brake pedal feels MUCH improved after being proper anchored down again. This setup will never fail, so I am happy with it. It's too bad more people don't know about it. I've been around the YJ world a long time and never heard of this, until my own broke and I searched and found it.
 
Rewiring the Front Lighting Harness

Not really liking the way I wired my headlight harness to my relay box in 2018, I decided to redo it a few weeks ago. Back when I did it the first time, I didn't have many wiring tools, didn't know about good wiring tapes, etc. I was also in a rush to get the job done so ultimately it just didn't turn out the best. It did work fine but it was not ideal IMO.

In addition to cleaning up my previous work, there were other reasons to doing this:

1. Adding functionality (building in wiring to the parking lamps to be a daytime running light, adding in a circuit for fog lights, adding wiring for an electric pusher fan to assist with cooling when AC is on).
2. Reworking the ground circuits to be more reliable. The factory headlights, turn signals, side markers, horn, washers, and fog lights all ground to the two tiny little studs on the grille. I put the headlights on a ground circuit and put everything else on one ground circuit. I then ran them to the Eaton Bussman block that I previously wired into the Jeep. The Bussman has two buss bars, one for ground and one for battery +.
3.Lastly, to clean up the nasty old wires, replace any dirty corroded ones with new, and make the harness overall more serviceable by connecting it to the Jeep and the relay box via Deutsch connectors for easy disassembly.

I picked up some Novita SC04 Headlight sockets which are fully ceramic with protective jackets on them, and utilize true 14AWG wiring. They seemed like a good choice for my current Hella H4 headlights and my future JW Speaker headlights. I bought a harness off of ebay to give me a starting point. When I wired in the relay box years ago, I gutted most of the wiring out of the factory loom and used 12AWG. Therefore, it would have been more difficult to try and resurrect my old harness. For that reason, I opted to buy a used one off of eBay and doctored it up to fit my needs.

Relays:
1. Low Beam Power
2. High Beam Power
3. Parking Lamp Trigger for JW Speaker Headlight Heaters
4. AC Condenser Pusher Fan Relay
5. Unused/Reserved for Future

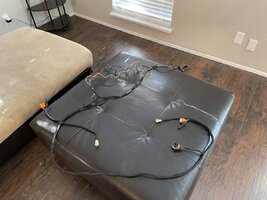
I worked on it for probably 10 hours cutting, splicing, adding circuits, etc. The final result before being permanent is shown below. All the loose wires branching out of it were to go to the relay box. the wires dangling off the ottoman were the old bulkhead connector that I would soon cut off. The bulkhead on the eBay harness was damaged, so I cut off the eBay one and used a Deutsch 8-pin to connect the eBay harness to my old harness bulkhead.

IMG_1953.JPG

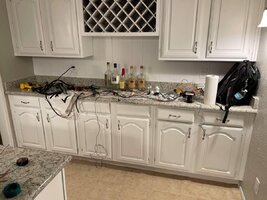
It was a busy night....

IMG_1954.JPG

Here are some pictures showing the harness mocked up in the Jeep with the relay box nearby, this step was so that I could cut the wires to the proper length for the Deutsch connection to the relay box.

IMG_1955.JPGIMG_1956.JPG

Here is my relay box handy work:

IMG_1960.JPGIMG_1958.JPG

Relay box is complete and terminated to a Deutsch!

IMG_1957.JPG

Here is the non-loomed harness all cut and terminated and everything plugged in. At this point I needed to remove the harness, loom it, and plug it back in.

IMG_1961.JPG

Here is how the harness turned out after I was fully done with it. Loomed, fully terminated, 100% plug and play and much more useful than stock! I also built in the diode and resistor harnesses for the side markers. It is as if they have always been there.

IMG_1962.JPG

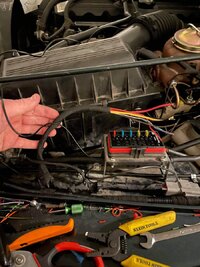
Here is the final setup in the Jeep. Harness is Deutsch connected to the Jeep and the relay box, all lights work. I ordered some 8AWG red and black cabling as well and redid my connections from the battery to the relay box with nice heat shrink on the ends as well. I hid the cabling in loom so you don't see a bright red cable draping across the engine bay.

IMG_1964.JPGIMG_1207.jpeg
 
  • Like
Reactions: doc-ketamine
General Overview

So! This pretty much catches up the big changes to my Jeep over the years. There are many small items in between, but it's just way too much to catch up on.

So what's next?

Projects and Parts I have planned for near future:

-Vanco 15" Big Brake Kit
-YJ Dana 30HP Front Axle - Detroit TrueTrac & 4.88 Gearing
-TJ Dana 44 Rear Axle - Detroit TrueTrac, 4.88 Gearing, & refreshed disc brakes
-All new Mopar tie rod ends, steering damper, Rubicon Express drop pitman arm, alignment
-Reinstall single diaphragm brake booster and stock brake master cylinder
-BFGoodrich 33x10.5R15 KO2 Tires
-JW Speaker 8910 Heated LED Headlights
-Tuffy Stereo Console
-Sony DSX-M80 Stereo Head Unit
-Kicker 4X6 Dash Speakers
-JL Audio 6X9 Wheel Well speakers in VDO roll bar pods
-JL Audio 10" Subwoofer in SonoPod Housing behind back seat
-Tuffy trunk
-Tuffy Radio Hole Cover Panel (for Mounting Switches - Fog Lights, Seat Heaters, Driving Lights, DRL Cutoff, Winch)
-Cobra 75 CB Radio
-Carpet Flooring Kit
-Seat Covers
-Interior warm white LED strip lighting for under dash courtesy lights and under hardtop rails

I look forward to updating the thread as progress happens, as I change my mind on choices, and as the list grows with new potential mods I'll make.
 
Last edited:
Lov
I suppose it's time to actually update some of this build thread! With so many years having gone by since purchase, I’m really going to glaze over the history and try to include the key points and some relevant pictures from whatever I have in my photo library. It’s just too much to catch up on otherwise.

After I brought the Jeep on the 600-mile drive home, I began figuring out the first things I was going to do. I immediately noticed the speedo read 60 when GPS was at an actual speed of 67, so the first thing I ordered was a 32-tooth speedo gear for the 31’s. My Jeep had 3.55 gears from the factory and the speed had never been corrected. The new gear got it close but provided some error in the other direction. 60 on the dash now correlated with 58 GPS, but that was overall not a big deal. I also ordered a Rugged Ridge Jeep cover and their cheap cable lock kit. It worked okay, eventually I realized it was too much work to deal with daily and stopped using it. I also accidentally ripped the cover and it eventually landed in the garbage.

My first repair happened after one single week. The slave cylinder went bad on me. I was 100% a novice wrencher with practically no experience, so it was worrisome at first. After talking to a few folks I figured out that it was the slave cylinder assembly and went and got a pre-bled master and slave cylinder unit from O’Reilly. It was the PowerTorque brand. It worked fine for a year or so, sadly, I had to do warranty replacements for these 3 or 4 times. Tired of that, I eventually replaced with a “Mopar” unit that appears identical to the ones purchased from Luk and a few other brands on RockAuto. I spent $200 on my Mopar one and Luk are more around $100 so I’d advise looking into those for replacements. I only use pre-bled assemblies since I have a ‘94 external slave model. I have never had any luck bleeding clutch linkage assemblies so if pre-bled is an option, I always go that route. Anyways, my first repair was unsurprisingly a slave cylinder swap and years later I'm pretty good at doing them after all the failures I've had.

Over the next few years, I spent money here and there doing various little mods as I could afford them since I was finishing high school and starting college over these times.. These included:

Mopar TJ Door Mirrors

View attachment 116673


Pardon the grainy picture on this one. It's a screenshot of a picture I used to have and lost. It shows the mirrors well enough. They can also be seen in the pics of the first post.
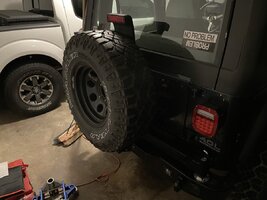

Rampage Rock Rage Bumper and Tire Carrier – absolute piece of shit, would NOT recommend (only manufacturer picture available)

View attachment 116679


This tire carrier sucked. I ran it for maybe six months before replacing it with the Smittybilt below due to towing needs. It was extremely rattly, missing half the hardware upon arrival, and just overall a very discouraging product. Thankfully, I think it's discontinued or very hard to find these days, and for good reason.

Tuffy Console – love this one!

View attachment 116677


This console is a beast. I have the 6.5" model since it fits in between the wide seats of 91-95 YJs the best. It has loads of storage, the armrest is comfortable, and it's solid as a rock. I recommend Tuffy consoles to everyone asking for console suggestions. Mine does look a bit aged with some rust, and not so pretty armrest, but it's fine.

Front and Rear brake replacement (no pics - used Hawk TPS Pads and Roto-Tech slotted/drilled rotors. Blah, they sucked).

Replaced my Clutch with a Luk 05-065 Repset model (no pictures, clutch worked great though).

Smittybilt SRC to Replace the Rampage – also a piece of trash, would not recommend. I did not know any better back in those days (pic taken from Quadratec - no pics on my rig)

View attachment 116680


This tire carrier also sucked. It was better than the Rampage, and I ran it a while. But overall, it was very rattly, very heavy to operate, and just overall cheap build quality. Not the worst option ever for someone on a budget, but besides that, I would never consider it.

Tuffy Glove Box – Also a big fan!

View attachment 116678
View attachment 116681


This one was relatively loud and rattled for a while. I fixed it by buying some little rubber bumpers off of Amazon. Cut them enough to make them fit and they stopped all of the lid's chatter. You can see a bumper screwed down in the second pic.


Rough Country 2.5” Lift Kit

View attachment 116675View attachment 116676

Rugged Ridge SYE

View attachment 116674

This isn't the best SYE on the market. Out of the box it leaked. The yoke also rusted really quickly. I fixed the leak by buying a pinion seal for an AMC 20 CJ Rear Axle which sealed perfectly. The yoke rusting didn't really matter in the grand scheme. Otherwise, it has worked fine. It will be replaced with my JB Conversions Standard SYE that I have on the shelf, sometime in 2021.

Double Cardan Driveshaft made by a local driveshaft shop

No pics of this one. I had the shop build me a double cardan shaft to go with my RR SYE. It worked fine, although it had a vibe on the highway. Took it back to the guy and he fixed it. It was overpriced at $380, and I had to wait two weeks for him to build it. Live and learn, should have gone to Adams or Tom Wood. I eventually outgrew that driveshaft with more lift.

These were most of what I needed to have a decent daily driver that I didn’t have to worry about too much. I did do some repairs but won’t go into too much detail. Radiator 5 years ago, several water pumps, thermostats, a few sensors, etc. Pretty boring stuff overall.
Love my Tuffy console! Spent about $700 and 8 months to get it the way I wanted it, but the finished product is Perfect!
 
  • Like
Reactions: machoheadgames
Lov

Love my Tuffy console! Spent about $700 and 8 months to get it the way I wanted it, but the finished product is Perfect!
Yeah I love the Tuffy. I actually bought another one, with the stereo slot. Moving my stereo to there, and putting a switch panel in the old dash slot. The Sony radio I'm going with has a rear USB port so I'm running that up to the dash to plug my phone into, yet the radio will be right under my arm when I'm on the armrest. Should be perfect. Tuffy is taking their sweet ass time getting me the switch panel, so that is currently the holdup. Already got all the wiring extended, but still need to install the console, and do the switch panel stuff. I'm excited to get it all done, just so damn tired of waiting. Really ready to get my axles done as well. Between axles, stereo, and tuffy, there really is not much left.
 
  • Like
Reactions: jeepjoe43
Yeah I love the Tuffy. I actually bought another one, with the stereo slot. Moving my stereo to there, and putting a switch panel in the old dash slot. The Sony radio I'm going with has a rear USB port so I'm running that up to the dash to plug my phone into, yet the radio will be right under my arm when I'm on the armrest. Should be perfect. Tuffy is taking their sweet ass time getting me the switch panel, so that is currently the holdup. Already got all the wiring extended, but still need to install the console, and do the switch panel stuff. I'm excited to get it all done, just so damn tired of waiting. Really ready to get my axles done as well. Between axles, stereo, and tuffy, there really is not much left.
Ya, I bought the "Deluxe Stereo Model" and mounted the CB in it and put the Stereo in the the removable tray.
Also put All my accessory controls in it, as well as the speakers for the stereo and the CB.
Had to build some bulkheads, but it came out awesome. Also mounted my fire extinguisher in it.
 
Last edited:
Small Progress Update:

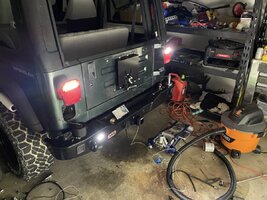
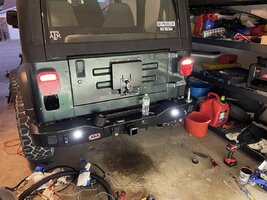
Nothing too exciting to post for now, I finally finished the install and final adjustments of my ARB rear bumper/tire carrier. Since I'm currently not driving the YJ, I decided to buy 2 sets of 1500 LB Pittsburgh Car Dollies from Harbor Freight. These things are awesome, can't believe I didn't buy them sooner. Nothing beats being able to just roll a rig across the garage to clean underneath it. Also, I had the YJ backed into the garage, so this gave me the chance to swivel it around in a 180 so I could get a better view of the bumper and all the lighting back there at a distance, and do some visual testing. The backup lights from Baja Designs absolutely blew me away. Not only are they super bright at night, they actually hurt eyes to look at during the day. They are very good as backup lights.

Here are some shots of the bumper from the rear and side angles:

I really like how clean it looks. The extra space for the lights and tow plug is a huge bonus as well.

IMG_3263.JPEG


64047634181__0C82D9C4-AAC1-4F81-B90D-B19EE3508CAA.jpeg


Side Profile:

IMG_3262.JPEG


Good Representation of the Newer Brake Lights (Quadratec LED Kit & VLED 921 Third Brake Bulb in a TJ Third Brake Housing):

IMG_3256.jpeg


Video Illustrating the Baja Designs S1 Lights (Flush Mount, Work/Scene Lens, 2 of them):

These lights are AWESOME! Worth every penny, for sure...


What's Next:


Currently I have the transmission out, and have a slew of repairs/improvements in the works:

Clutch/Flywheel Job currently underway:
Picture of old rusty Luk Clutch & Flywheel from 2014:
IMG_3301.jpeg


As part of my clutch job, I am not reinstalling the transfer case for now. I am keeping it out of the Jeep and will be rebuilding it with a wide chain kit, 6 pinion planetary, and a true neutral shift plate. In addition to this I will be picking up a regeared Dana 30 and TJ Dana 44 with 4.88s and Dual TrueTrac LSDs. We will rebuild the case when I go pick up the axles. I will likely be ordering new driveshafts as well due to the Dana 44 and the fact that mine are pretty old and rusty by now.

After the clutch, axles, transfer case are all done, I will be getting new tires: BFG KO2 33x10.5, and they will be mounted to the AR23 15x7 wheels.
 

Attachments

  • IMG_3276.mov
    49.7 MB
Last edited:
Can't wait to see her sittin' pretty on those new wheels and 33s!
Interesting mods for the T-case, I didn't know they existed, well I recently learned about the TJ sector.
Good for future reference though, as mine will be coming back out when I do the SM420.
I will be looking into those. If you're going to hog wild, go WHOLE HOG.
Just did the SYE and a LUK clutch (since I was there) on this go around.
 
  • Like
Reactions: machoheadgames
Can't wait to see her sittin' pretty on those new wheels and 33s!
Interesting mods for the T-case, I didn't know they existed, well I recently learned about the TJ sector.
Good for future reference though, as mine will be coming back out when I do the SM420.
I will be looking into those. If you're going to hog wild, go WHOLE HOG.
Just did the SYE and a LUK clutch (since I was there) on this go around.
Same here! I am dying to see them. I bought the wheels like 9 months ago now, so I am itching. I even bought whole new wheels and tires for my truck after the Jeep wheels, and still have no tires for Jeep. Only reason being, there’s no sense in buying tires while the Jeep still sits waiting on the other stuff to be complete.

I did end up going whole hog, I‘ve got it all disassembled right now. Decided to do a new rear main seal, oil pan & gasket, and my timing cover is disgusting, so going with a new cover, and a double roller chain there. I had to drain the radiator for that, which reminds me that I do want to refresh and overhaul the cooling system, but I’m going to do that a bit later.

Yeah, I got the transfer case parts off eBay. They can be bought from websites like JB conversions, but he charges a lot. The only tricky part, is the planetary needs to be sourced depending on the age of transfer case you have. The transfer case has that pressed in annulus gear that the planetary sits inside of and meshes with. They changed the cut of those teeth somewhere around 94 or 95, it’s a gray area. They also changed the input gear (sits inside of the planetary and engages to the back of the transmission), so you have to have a late or early input gear as well.

I am banking on mine being an early model with the older gear cut. If I find out I have the late cut, I’m going to go without the planetary. I am hoping mine is older, since I had to press caged needle bearings out of my transfer case gears when I did the SYE years ago. It seems like the 94s and the 95+ that don’t need to do that (because they didn’t come with the caged bearings), are the same guys with later gear cuts. My 94 was built in October 93 so it’s one of the oldest 94s. That and the caged needle bearings hopefully means I bought the right planetary. I got it, and the wide chain from eBay.
 
  • Like
Reactions: jeepjoe43
Same here! I am dying to see them. I bought the wheels like 9 months ago now, so I am itching. I even bought whole new wheels and tires for my truck after the Jeep wheels, and still have no tires for Jeep. Only reason being, there’s no sense in buying tires while the Jeep still sits waiting on the other stuff to be complete.

I did end up going whole hog, I‘ve got it all disassembled right now. Decided to do a new rear main seal, oil pan & gasket, and my timing cover is disgusting, so going with a new cover, and a double roller chain there. I had to drain the radiator for that, which reminds me that I do want to refresh and overhaul the cooling system, but I’m going to do that a bit later.

Yeah, I got the transfer case parts off eBay. They can be bought from websites like JB conversions, but he charges a lot. The only tricky part, is the planetary needs to be sourced depending on the age of transfer case you have. The transfer case has that pressed in annulus gear that the planetary sits inside of and meshes with. They changed the cut of those teeth somewhere around 94 or 95, it’s a gray area. They also changed the input gear (sits inside of the planetary and engages to the back of the transmission), so you have to have a late or early input gear as well.

I am banking on mine being an early model with the older gear cut. If I find out I have the late cut, I’m going to go without the planetary. I am hoping mine is older, since I had to press caged needle bearings out of my transfer case gears when I did the SYE years ago. It seems like the 94s and the 95+ that don’t need to do that (because they didn’t come with the caged bearings), are the same guys with later gear cuts. My 94 was built in October 93 so it’s one of the oldest 94s. That and the caged needle bearings hopefully means I bought the right planetary. I got it, and the wide chain from eBay.
Mines a '91, so I'm probably good to go with the gears, not that I really need the beef with 2.5.
 
Mines a '91, so I'm probably good to go with the gears, not that I really need the beef with 2.5.
Yep, you are virtually guaranteed to need the planetary I bought, assuming it’s original. And yeah you probably don’t need the beef, but it is what it is. Somebody else would be more interested later if you were selling the case, etc. no reason not to unless the money is an issue really.
 
Yep, you are virtually guaranteed to need the planetary I bought, assuming it’s original. And yeah you probably don’t need the beef, but it is what it is. Somebody else would be more interested later if you were selling the case, etc. no reason not to unless the money is an issue really.
I've been a mechanic all my life, dad taught me if you're going to take something apart to fix it, clean it, paint it and make it new.
If possible, improve it. That's always been my MO. When I haven't followed it, it bites me in the arse.
 
Clutch, Flywheel, Timing Chain, & Rear Main Seal (Part I)

My clutch got some oil on it from a valve cover leak a few years ago. Ever since, it had been quite jerky, and randomly very grabby. It was unpredictable at best, so I decided to change it again, as shown above. This was a standard Luk Repset Clutch (05-065) that I had installed in 2014, when I had owned the Jeep around a year.

Got the flywheel plate all clean....it was black before. Spraying it with simple clean and scrubbing with a dish pad makes quick work of it.

IMG_3396.jpeg


While I have it apart, I cleaned up the clutch fork, ordered a new Mopar fork retainer spring, and a new Mopar pivot ball. The fork gets some grease where the throwout bearing sits and under each end where it pivots on the ball and is operated by the clutch slave cylinder. Using a Mopar throwout bearing as well, seems to have the best reviews and longevity.

IMG_3407.jpeg
IMG_3408.jpeg


Purty new Centerforce High Inertia flywheel....should help nicely with starting from stops.

IMG_3341.jpeg


The clutch job has sort of turn into a domino effect of 4-5 other things, as these projects usually do. The 4.0L engine uses a 2 piece rear main seal, which means that it can be changed by dropping the oil pan. You DO NOT have to pull the transmission for a 4.0. You do have to pull the transmission for a 2.5 RMS. However, my RMS has been bad for a while, and with the transmission out, there is a nice bit of room to sit and move around under the Jeep, so I am going ahead and changing it. Plus, now is the time to clean up all the gunk in the flywheel area, if I button it back up without changing the RMS, the gunk will come right back as soon as I start driving it.

My oil pan is nasty so I ordered a Spectra Premium oil pan as well. I would prefer Mopar ($2-300) but for $60 and complete 5 star reviews, we're giving this one a shot. You can see how nasty the old stuff is.

IMG_3334.jpeg


Apparently 1996 and newer 4.0s (and even late 95 YJs) had a metal girdle added to the bottom of the engine to brace the main bearings and strengthen the overall lower portion of the engine. The YJ engine uses normal bolts for the main bearing caps, the 96 and later use stud style bolts that have a tip on them you can bolt the girdle to. While I have everything apart, I am swapping all the bolts to the later model studs, and adding a girdle. An engine with a girdle is pictured below.

1619533678423.png


I haven't received the oil pan, gasket, or RMS yet, but I did receive the girdle and the stud bolts so I went ahead and installed the bolts last night. As you can see in the first pic, I had already changed one stud by the time I remembered to snap a pic. This part was easy, just remove the old bolts, and retorque each to 80 ft-lbs. Only do one at a time, so that the crankshaft is properly supported at all times.

IMG_3399.jpeg
IMG_3406.jpeg


Since I had the oil pan out, naturally I need to dig into the timing cover too right?! My old timing cover was absolutely filthy, so I'm changing it as well, along with a double roller chain and gearset from Cloyes (9-3127). My old disgusting timing cover is shown below, and the picture really does not do it justice.

IMG_3394.jpeg


So at this point, with this chain of repairs, my status is as follows:

1) waiting on oil pan, oil pan gasket, RMS, timing set to arrive
2) Install timing set & cover after receiving
3) Install RMS, girdle, then oil pan & gasket
4) install flywheel plate, flywheel, clutch, transmission
5) button it back up and go for a drive

Hopefully in a week or so, this project will finally be done. I'm really looking forward to the new smooth clutch and heavier flywheel.