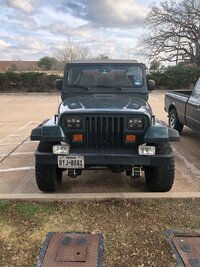
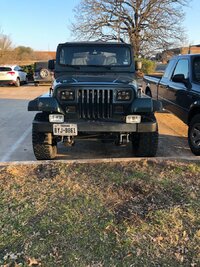
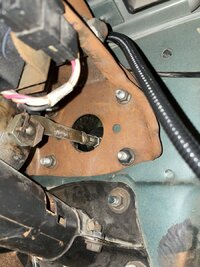
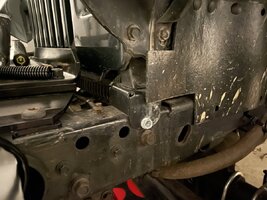
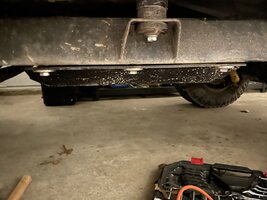
My '94 Hunter Green “No Compromises" Build

machoheadgames

Certified YJ Researcher
Supporting Member
Joined
May 19, 2020
Messages
2,003
Location
Dallas, TX
After nearly eight years, I suppose it's time I finally make a build thread for my 1994 YJ. I've been on all the forums for probably a decade but was always too lazy to make a build thread or really post much of anything. I’ve finally decided to make a build thread for once.

Specs:

Year/Make/Model: 1994 Jeep Wrangler YJ
Trim: SE/Base
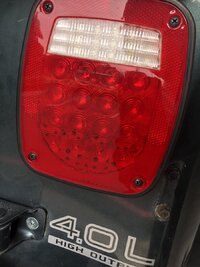
Engine: 4.0L I6
Transmission: 5-Speed Manual AX15
Color: Hunter Green Metallic
Top: Hard top and added Bestop soft top

Mods

Interior:

  • Rugged Ridge all weather floor mats
  • Tuffy console with radio slot
  • Sony DSXM80 marine radio in Tuffy slot
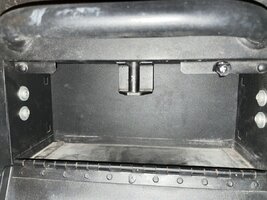
  • Tuffy glove box
  • Bestop seat covers
  • Stock Interiors ACC plush cut full carpet kit - charcoal color
  • Kilmat sound deadening on floor
  • Interior switch panel on center trim bezel for future lighting

Exterior:
  • Warn front bumper
  • JW Speaker 8910 Chrome Heated LED Headlights
  • KC Gravity G4 amber fog lights
  • ARB rear bumper and tire carrier
  • Crown OEM style fender flares

Drivetrain:
  • Stock 4.0L motor
  • MORE 1" motor mount lift
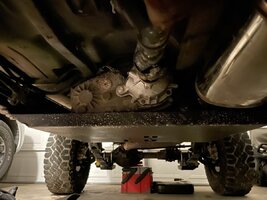
  • 1.5" tummy tuck skid plate
  • 1.25" body lift
  • 2016 AX15 transmission
  • NP231 transfer case
    • JB Conversions rebuild kit
    • JB Conversions standard SYE
    • TJ true neutral shift plate
    • 6 pinion planetary
    • Wide chain kit
  • Dana 30 Front Axle
    • 4.88 Rough Country gears and Revolution master install kit
    • Detroit TrueTrac LSD
    • Passenger side TJ axle shaft conversion
    • Napa 11800 seal for TJ axle conversion
    • Spicer 5-760x u-joints
    • Spicer 706944x ball joints
    • 85W-140 Currie GL6 gear oil
  • Dana 44 Rear Axle - from 2006 TJ
    • 4.88 Revolution gears and master install kit
    • Detroit TrueTrac LSD
    • Stock disc brakes
    • Crown/RT disc brake cable conversion for parking brake
Exhaust
  • Dorman header
  • Stock downpipe
  • Magnaflow catalytic converter
  • Magnaflow catback exhaust
Fuel System
  • MTS fuel tank
  • MTS fuel sending unit
  • MTS fuel tank skid plate
Performance
  • Nothing but regear

Steering, Suspension & Tires:
  • 31x10.5R15 Goodyear Wrangler Duratrac (5)
  • Cragar Soft 8 15x8 4" BS (5)
  • Old Man Emu 2.5" Suspension (custom chosen with itemized parts)
    • OME bushings
    • OME shackles
    • OME 36R springs on all 4 corners
    • OME shocks
  • All new steering linkage
  • Sway bar added back
  • Front track bar added back

Future:
  • KC Gravity Pro6 driving lights
  • Full stereo system
    • 4 channel and 1 channel small Class D amps by Kicker
    • Front 5.25" component speaker system
    • Tweeter mounts to door frame
    • Tuffy 5.25" speaker box for transmission hump
    • 3-way Kicker 6x9 speakers
    • 6x9 speaker pods between roll cage and wheel well
    • 10" Kicker sub
    • 10" sonopod enclosure
  • Odyssey/Northstar/X2 Group 65 AGM battery
The story:

I am the 4th owner of this Jeep. It was first sold in October 1993 at a Jeep Eagle dealership in Colorado. The original owner moved it to Florida for retirement. Once he grew tired of it, he sold it to a real estate agent in Wichita, KS. That guy had it from 1999-2002. In that time period he put a few cool little mods into it, but most of them are now gone. These included:

  • Warn Side Steps (gone)
  • Misch Full Door Armrests (still here)
  • Xenon 6" flares (gone, back to stock)
  • 31x10.5R15 and Chrome 8-round hole steel wheels (gone)
  • Wet Okole seat covers (gone)
  • Xtreme Motorsports stock size spare tire cover (gone)

And a few small other items that I'm forgetting. In 2002, he sold it to my grandfather in Wichita, at only 22,000 miles which is pretty good for 7 years old at the time. It was still in like new condition.

My grandpa bought it right after his retirement. He made absolutely no changes to it, just kept up with fluid changes, wash/wax, and kept filling it up with gas. In 2008, he passed away from a tough battle with colon cancer, leaving the Jeep behind. At the time I was 13, had lots of cousins similar age, grandma didn't want to get rid of the Jeep anyways so it sat for a while. In 2009, Wichita had serious flooding for several days. My uncle lived nearby and was using it to pick up his kids from school (figuring it was a better choice for floods than his Miata at the time), when water got into the engine and hydro-locked it. Insurance originally totaled the YJ, wanting to give my grandma a few grand and send her on her way. She refused, and convinced adjusters to come look at it. They realized how immaculate it truly was, and opted to have a local shop install a Jasper remanufactured 4.0L into it. Jeep ran like new again after that.

Once 2012 came around, I was old enough to work and decided I wanted to buy the Jeep. My grandmother agreed, she could tell I really wanted it. time went by, I eventually got my money together and brought the Jeep home at the beginning of July 2013, at just four months shy of it being 20 years old! The jeep was still in EXCELLENT shape when I got it, and only had 45,000 miles at my time of purchase. Still low!

I daily drove the YJ for 4 years, which after a while got sort of old. Texas is hot, no AC sucks, and rough YJ ride just wore me out after so many years of it. I set the Jeep aside as a toy and purchased an economical 2005 Ford Ranger to get me by for a few years. This year, the Ranger was finally giving me enough trouble that I sold it and purchased a 2019 Nissan Frontier as my daily driver. It's funny: the Frontier is basically the YJ version of all the modern trucks. It is so basic that it's almost hilarious. Needless to say, it's pretty much a perfect truck for someone who doesn't care about all the frills that make modern trucks cost $60K+. But anyways, back to the YJ.

I am posting some pictures of the YJ from when I bought it, followed by a few recent ones from this year. I have had many experiences of trial and error with this YJ. I learned pretty much everything I know about automotive from working on this Jeep and my other two vehicles. this includes changing suspension 3 times, changing things and then ultimately changing them back to stock, etc. I have too many memories to ever get rid of it, and now with a steady income, it's time to finally make the permanent changes I want to in order to make it what I've always wanted it to be. In the end, I've dubbed this to be a "No Compromises" build. While the theme originally was and still somewhat is, keeping it simple, sometimes I insist in complicating things in order to not compromise what I want. For the most part, my Jeep is a healthy mix of "stock, but improved". Most people would look at my Jeep and think not much has been done to it. While that can either be lame or secretly cool, I think it's cool. Deep down people would see the things I've done and yet have no clue how much work went into the Jeep as a whole. That's what I like. All they see is the improved results with no clue what actually improved.

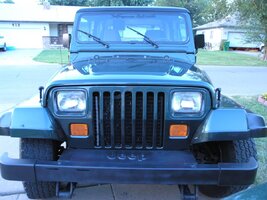
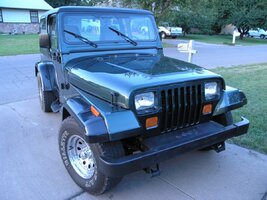
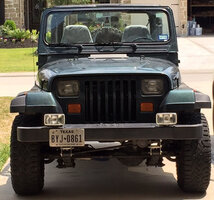
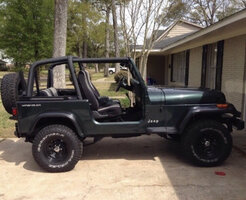
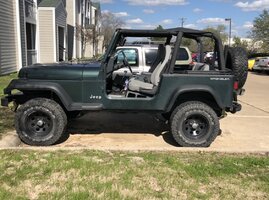
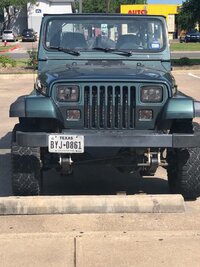
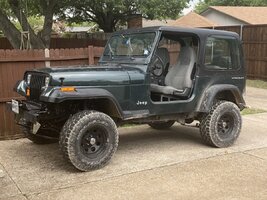
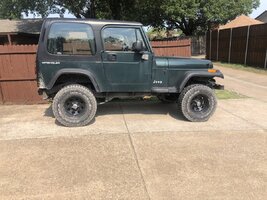
These pictures were taken by my dad in 2004. I was only 9 and didn't care about it, so I don't remember this at all. It basically still looked identical to this in 2013 when I purchased it, other than the new engine under the hood. The engine still looked factory, I would have never known it was swapped if no one had told me.
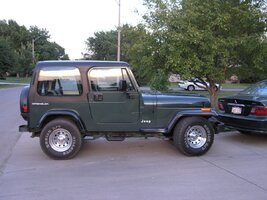
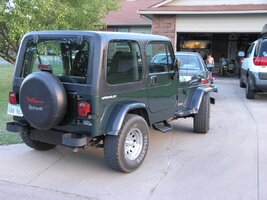
IMG_1096.jpegIMG_1095.jpegIMG_1094.jpegIMG_1093.jpeg

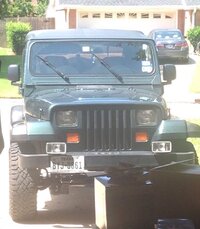
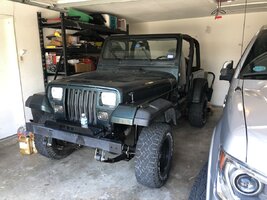
Here it is, the day I officially bought it, July 1, 2014. It still had the tires from the pictures above, so naturally they needed to be swapped before a 500 mile drive home. I was a big fan of the black out looked as a teenager, so I elected for some cheap ole Cragar Black Steelie Soft 8's paired with new 31x10.5R15 Goodyear Wrangler Duratracs.
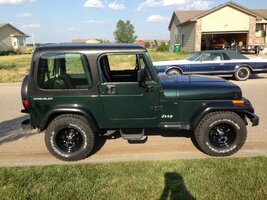
IMG_0789.jpeg

Here it is earlier this year. At the time it had the body lift, BDS 3.5" Suspension, and MORE 3/8" shackles. It also had blacked out turn signals with amber bulbs. I liked the look decently I guess, but ultimately opted to go back to amber housings and installed LEDs utilizing an awesome write-up on the TJ forum from member @Steel City 06. YJ and TJs utilize the same side marker light setup so my buddy had some diodes and resistors and made the harnesses for me and shipped them.

The plan was for 35's in this picture. Jesus, it was truly way too tall. The reason for this pic was I had just brought the hardtop back home from my parents, who had been storing it from me since I went to college. I hadn't had the hardtop on the Jeep in something like 5 or 6 years.
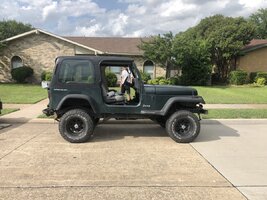
IMG_4334.jpeg

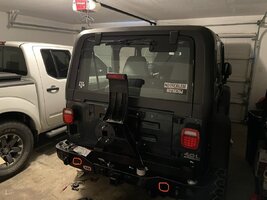
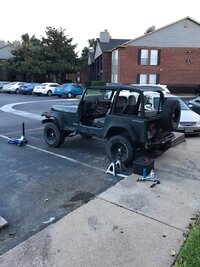
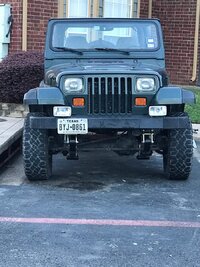
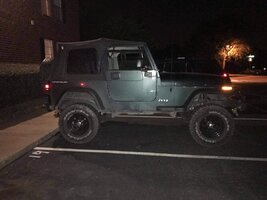
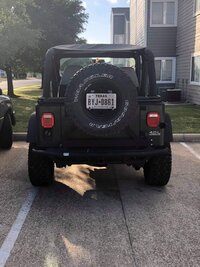
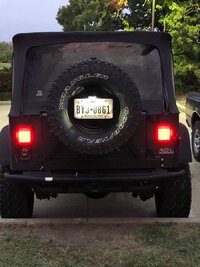
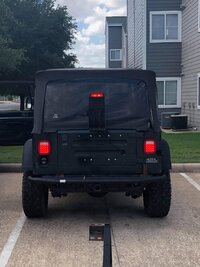
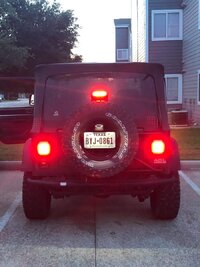
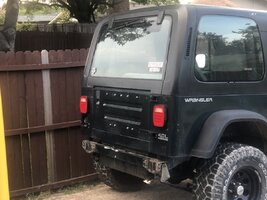
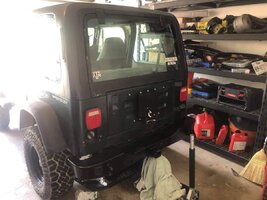
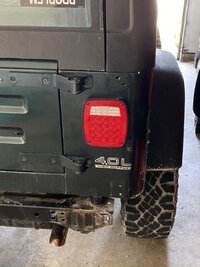
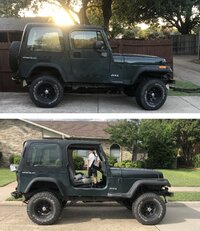
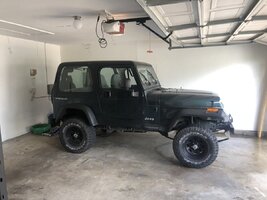
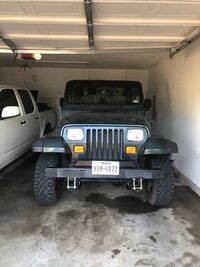
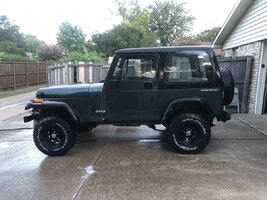
Here is what the YJ finally looks like today, in 2020. This is with the OME 2.5" Suspension, 1.25" Savvy body, still old tires and wheels which I haven't swapped yet. The fender flares are in the process of going back to stock, but other this is exactly what my YJ looks like. The Smitty bumper in the side profile pic is gone though, and has been replaced with the ARB bumper and tire carrier in the last photo (the red circles are illustrations showing my friend where I'm going to install some Baja Designs S1 lights for reverse). More on all that later.
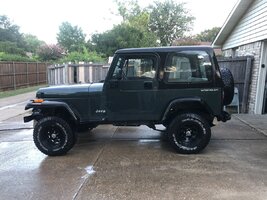
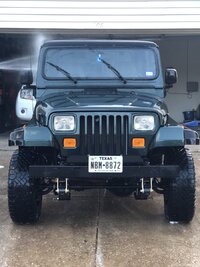
IMG_4650.jpegIMG_4651.jpegIMG_0075.jpeg

Since it's been 7.5 years that I've owned this Jeep, naturally I have a LOT of catch up to do as I travel through the years of mods and such. Hope you all enjoy my thread.
 
Last edited:
Looks like a nice YJ with a solid build in mind.

I'm with you on keeping it simple too. It's easy to fall into the 35s trap and before you know it you end up building a rock crawler, which isn't that practical, and truthfully speaking, if you're really wanting to crawl rocks, I think you're better off with a purpose built buggy. Then you don't run into limitations like the fenders, flares, frame, etc.
Thanks Chris.

it is indeed a pretty nice Jeep, albeit not what it was years ago. Going from 20 years of being garage kept to 7-8 years of sitting in the sun seriously took its toll. But no big deal, I’ll eventually get it back to what it once was, however improved as well.

And I agree. I’m not even against 35’s either, but sometimes the big setup just doesn’t make sense. It definitely didn’t make sense for me: someone who will never ever be a hardcore rock crawler. This is more of a nice weather driver and will pretty much forever be that way. I’m just glad I’m finally getting to implement all the changes I want. I’ve been waiting a while.
 
  • Like
Reactions: Chris
Thanks Chris.

it is indeed a pretty nice Jeep, albeit not what it was years ago. Going from 20 years of being garage kept to 7-8 years of sitting in the sun seriously took its toll. But no big deal, I’ll eventually get it back to what it once was, however improved as well.

And I agree. I’m not even against 35’s either, but sometimes the big setup just doesn’t make sense. It definitely didn’t make sense for me: someone who will never ever be a hardcore rock crawler. This is more of a nice weather driver and will pretty much forever be that way. I’m just glad I’m finally getting to implement all the changes I want. I’ve been waiting a while.
A Wrangler on 31’s makes for a reasonable road Jeep that looks aggressive and can tackle light trails/dirt roads which are fun.
 
A Wrangler on 31’s makes for a reasonable road Jeep that looks aggressive and can tackle light trails/dirt roads which are fun.
Yeah I'm aware, been driving the 31's for a long time now, just sorta tired of them and I've now set up my suspension and such for 33's that I don't want to undo that to keep the 31's (I have a tuck so I'm not removing the BL, and definitely not redoing suspension again. It does look decent as is, but I think 33's will fit the height a bit better).

I don't think 33x10.5 will provide any poor road characteristics compared to 31x10.5, since they should pretty much drive about the same (considering gearing and brakes are up to par, which they will be). I think the 15x7 wheels bringing my stance inward a bit will be good overall for unit bearing/ball joint stress, as well as tire scrub. Really the only thing I can think of that keeping 31's would change, is the look and the gear ratio to 4.56 instead of 4.88.

Mainly what i was trying to avoid are the lesser handling effects of 12.5" wide tires, and 35's (clearance, stress, etc.). Combine those together and it's just a huge tire that really makes no sense for me.
 
  • Like
Reactions: Fouledplugs
A Wrangler on 31’s makes for a reasonable road Jeep that looks aggressive and can tackle light trails/dirt roads which are fun.

Agreed, I've had both and I think if all you're going to do is on-road driving with the occasionally forest service road or light trail, 31s and a 2" lift is the best recipe.

Doing 35s right is a very expensive thing. Not to mention that it's a rabbit hole of "well, might as well do this while I'm in there".
 
I suppose it's time to actually update some of this build thread! With so many years having gone by since purchase, I’m really going to glaze over the history and try to include the key points and some relevant pictures from whatever I have in my photo library. It’s just too much to catch up on otherwise.

After I brought the Jeep on the 600-mile drive home, I began figuring out the first things I was going to do. I immediately noticed the speedo read 60 when GPS was at an actual speed of 67, so the first thing I ordered was a 32-tooth speedo gear for the 31’s. My Jeep had 3.55 gears from the factory and the speed had never been corrected. The new gear got it close but provided some error in the other direction. 60 on the dash now correlated with 58 GPS, but that was overall not a big deal. I also ordered a Rugged Ridge Jeep cover and their cheap cable lock kit. It worked okay, eventually I realized it was too much work to deal with daily and stopped using it. I also accidentally ripped the cover and it eventually landed in the garbage.

My first repair happened after one single week. The slave cylinder went bad on me. I was 100% a novice wrencher with practically no experience, so it was worrisome at first. After talking to a few folks I figured out that it was the slave cylinder assembly and went and got a pre-bled master and slave cylinder unit from O’Reilly. It was the PowerTorque brand. It worked fine for a year or so, sadly, I had to do warranty replacements for these 3 or 4 times. Tired of that, I eventually replaced with a “Mopar” unit that appears identical to the ones purchased from Luk and a few other brands on RockAuto. I spent $200 on my Mopar one and Luk are more around $100 so I’d advise looking into those for replacements. I only use pre-bled assemblies since I have a ‘94 external slave model. I have never had any luck bleeding clutch linkage assemblies so if pre-bled is an option, I always go that route. Anyways, my first repair was unsurprisingly a slave cylinder swap and years later I'm pretty good at doing them after all the failures I've had.

Over the next few years, I spent money here and there doing various little mods as I could afford them since I was finishing high school and starting college over these times.. These included:

Mopar TJ Door Mirrors

Mirrors.jpeg


Pardon the grainy picture on this one. It's a screenshot of a picture I used to have and lost. It shows the mirrors well enough. They can also be seen in the pics of the first post.


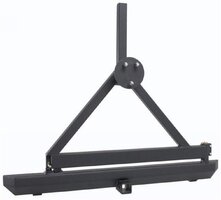
Rampage Rock Rage Bumper and Tire Carrier – absolute piece of shit, would NOT recommend (only manufacturer picture available)

51C7GJuePrL.jpg


This tire carrier sucked. I ran it for maybe six months before replacing it with the Smittybilt below due to towing needs. It was extremely rattly, missing half the hardware upon arrival, and just overall a very discouraging product. Thankfully, I think it's discontinued or very hard to find these days, and for good reason.

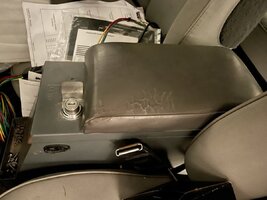
Tuffy Console – love this one!

Tuffy Console.jpeg


This console is a beast. I have the 6.5" model since it fits in between the wide seats of 91-95 YJs the best. It has loads of storage, the armrest is comfortable, and it's solid as a rock. I recommend Tuffy consoles to everyone asking for console suggestions. Mine does look a bit aged with some rust, and not so pretty armrest, but it's fine.

Front and Rear brake replacement (no pics - used Hawk TPS Pads and Roto-Tech slotted/drilled rotors. Blah, they sucked).

Replaced my Clutch with a Luk 05-065 Repset model (no pictures, clutch worked great though).

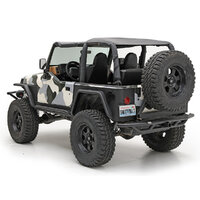
Smittybilt SRC to Replace the Rampage – also a piece of trash, would not recommend. I did not know any better back in those days (pic taken from Quadratec - no pics on my rig)

smittybilt-src-rear-bumper-tire-carrier-tj-yj-76621-main.jpg


This tire carrier also sucked. It was better than the Rampage, and I ran it a while. But overall, it was very rattly, very heavy to operate, and just overall cheap build quality. Not the worst option ever for someone on a budget, but besides that, I would never consider it.

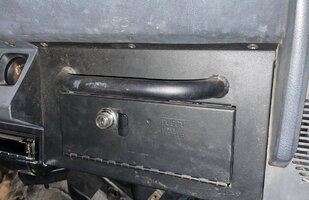
Tuffy Glove Box – Also a big fan!

Tuffy Glove Box.jpeg
IMG_0620.jpeg


This one was relatively loud and rattled for a while. I fixed it by buying some little rubber bumpers off of Amazon. Cut them enough to make them fit and they stopped all of the lid's chatter. You can see a bumper screwed down in the second pic.


Rough Country 2.5” Lift Kit

RC 2.5 Front.jpegRC 2.5 Side.jpeg

Rugged Ridge SYE

NP231 RR SYE.jpeg

This isn't the best SYE on the market. Out of the box it leaked. The yoke also rusted really quickly. I fixed the leak by buying a pinion seal for an AMC 20 CJ Rear Axle which sealed perfectly. The yoke rusting didn't really matter in the grand scheme. Otherwise, it has worked fine. It will be replaced with my JB Conversions Standard SYE that I have on the shelf, sometime in 2021.

Double Cardan Driveshaft made by a local driveshaft shop

No pics of this one. I had the shop build me a double cardan shaft to go with my RR SYE. It worked fine, although it had a vibe on the highway. Took it back to the guy and he fixed it. It was overpriced at $380, and I had to wait two weeks for him to build it. Live and learn, should have gone to Adams or Tom Wood. I eventually outgrew that driveshaft with more lift.

These were most of what I needed to have a decent daily driver that I didn’t have to worry about too much. I did do some repairs but won’t go into too much detail. Radiator 5 years ago, several water pumps, thermostats, a few sensors, etc. Pretty boring stuff overall.
 
Last edited:
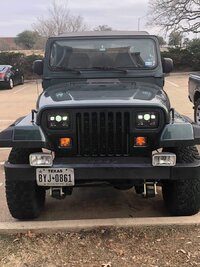
At Christmas time 2015, After 2.5 years of driving the YJ, I realized one thing. The brakes really sucked! I had replaced them in 2014 using some gimmicky drilled & slotted rotors with some Hawk pads (mentioned above). It didn’t stop any bit better than stock, and was still pretty scary overall. I wasn’t unaware of how poor the design was for our brakes from the factory. I did lots of research including reading lots of posts by mrblaine on the TJ forums. He is a brake expert for Jeeps and all his posts and some personal phone calls helped me learn just how it all worked. Eventually I realized my best option would be to install a Vanco Big Brake Kit. Since I had 31’s and only planned for 33’s at the time, I opted for the 15” kit.

At the same time, I also swapped my brake booster and master cylinder from those of a 95 4.0L YJ, which came with a dual diaphragm booster and a plastic reservoir master cylinder. I installed these first, and while they did make my pedal a bit softer, they didn’t really make the overall brake feel all that much better. I got the booster, master and some generic brake lines all from NAPA. I had to buy some Edelmann custom fittings to adapt the lines. If I were to do it over again, I would make my own lines and buy the proper brake tube nuts in order to look more like factory.

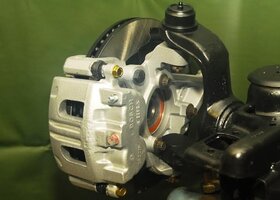
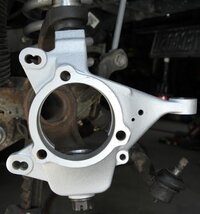
After my relative disappointment from the booster/master swap, Vanco install was next. This kit includes similar size calipers as stock, but they are a dual piston version and are mounted to a saddle. The kit included custom steering knuckles that are stronger than stock yet retain all the proper steering arm dimensions to retain stock steering aspects, and the kit also comes with Black Magic Brake pads and slightly larger than stock 11.25” rotors. The results of this upgrade are outstanding. The Jeep was always easy to stop from this point forward. The only issues is the strong brakes led me to figure out that Duratracs aren’t all that great in the rain. I found myself sliding a lot from the tires locking up very easily. It also didn’t help that I had 31” tires. 33’s or 35’s are probably better suited for the larger brakes. Overall though, the brakes were a huge upgrade and well worth the cost for the results. Some people respond to the price of the kit with the classic “I’ll just leave more following distance”, but that doesn’t always work. There is always the potential for someone to cut you off, kid run out in the street, etc and if you don’t have good brakes for those situations, you could end up in a really bad spot. If that happens, don’t let lawyers find out you have larger tires than stock.

Here is a pic of the kit on my Jeep, and some pics taken from the internet.

IMG_0297.jpeg

BBK NDM.jpg

ZaGaDGsa55SdTeRUEwByPxbCOaLzq6gc22y1R5EdTodnarMgeYsEInZn75_cxhRm6cW49edoWgTJ2TMvK9VSzLs.jpg
 
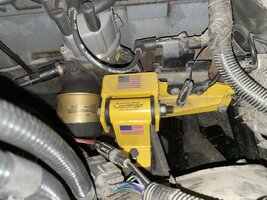
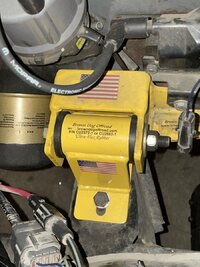
In summer 2016, my motor mounts were in really bad shape. I opted to install Brown Dog’s rubber motor mount kit as well as his engine brackets. They were of course overkill and not necessary for my needs, although no harm done. They worked well and were a relatively easy install. No complaints, they tightened up my driveline and made the throttle response a bit more responsive since they held the driveline still, much better than the rather loose stock mounts did. Overall, nice quality product that I’m happy with.

I originally bought the standard motor mounts. This year, I actually swapped them to the 1" MML. I installed a UCF tummy tuck and a Savvy 1.25" BL, so naturally I went ahead and did the MML as well. I also took that as a time to order a brand new Mopar transmission mount. The engine idles pretty vibe free these days.

In the passenger side pic, you may notice I have a bolt missing. Due to the alternator brackets, it was impossible for me to get the bolt in. These brackets use many more bolt holes than stock, so I figured skipping one wouldn't hurt anything. Someday I'll install it when I remove the alternator. No idea when that'll be.

IMG_0621.jpeg

IMG_0622.jpeg
 
  • Like
Reactions: Chris
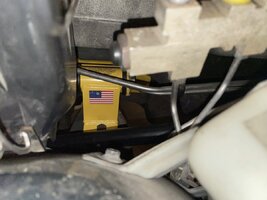
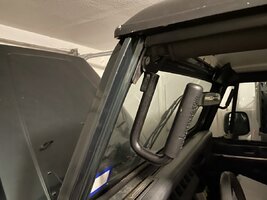
Later around Christmas 2017, one of my Jeep buddies gifted me some GraBar windshield mounted grab handles for some help I provided him earlier on. These are awesome! I highly recommend them, very handy to use and I wouldn’t own another Jeep without them.

View attachment 116689

View attachment 116690

IMG_0625.jpeg

Lighting...

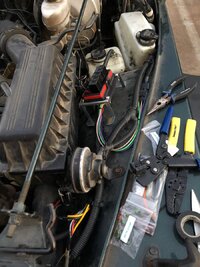
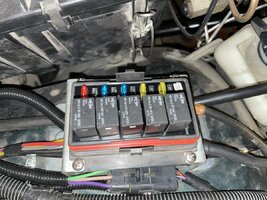
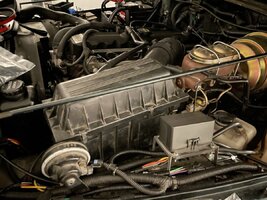
A few months later in early 2018, after growing tired of the sealed beam headlights, I decided to purchase some LED Headlights. They had a DRL function which at the time I wanted to use. A friend of mine at the time was often building relay boxes for friends and he decided to help me out. I didn’t really even know so much as what a relay did much less how they work. He set me up a Bussman box with 5 relay slots and set up 3 of them for me. One of the relays he provided a wire with a jumper harness so that I could plug into the transmission reverse switch to access keyed power. This triggered my DRL relay which turned my DRL automatically on. The other two relays he set up to use for low beam and high beam. Granted LEDs don’t typically need their low and high beams on relays since they draw so little power, but we figured why not. It was easy enough to do, and it left the option to swap back to higher wattage halogen headlamps later if ever desired.

Here are a few pictures from the newer lights. I swapped all the turn signals to smoked versions with amber incandescent bulbs. Contrary to popular belief, these did NOT make the visibility of the signals worse. I actually thought they were easier to see, and liked they way they looked with the headlights.

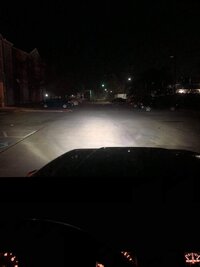
For the most part, I was excited about my new setup but after some drives on the road, realized these headlights weren’t so great. They looked cool I suppose, but other than that I was not a fan. Their pattern was not good on the road, especially in any rain.

Install and After Pics of the relay box setup...

relay box install.JPG

Reworking wiring.JPG

relay box close.jpeg

Completed Install

relay box.jpeg

Jeep Pictures After... (lights with amber signals, lights with smoked signals, and then with smoked signals and no ugly IPF lights)

jeep with new lights.jpeg

jeep with black signals.jpeg

jeep black signals side.jpeg

IMG_0473.jpeg


Overall, I think the smoked signals, no IPF lights, and the LEDs looked decent. The side profile looked really bland though, and in my opinion, really needs the contrast of amber housings.

Here are some pictures of the lights in action...they look better on camera than in person.

IMG_0628.JPG

IMG_0632.JPG


Finally, in 2019, I grew tired of these lights. I swapped them to the Hella H4 housings with 80W/100W bulbs. Thankfully, the relay setup is in place and provides the perfect foundation for bright lights like Hellas. I'll go over that install later.
 
Last edited:
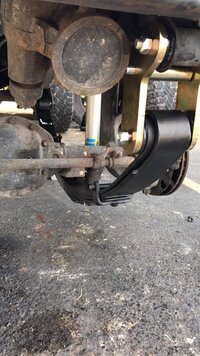
Jumping back to summer 2017, after 3.5 years of running the Rough Country 2.5” Lift, my leaf spring bushings were fully shot. They had actually been in bad shape for a year or so, meaning the bushings provided maybe a 2-year service life. That’s not so great. Rough Country sells bushings, but there are some politics involved in their process that I really don’t like. They sell their springs with really cheap rubber bushings pre-installed. They are the type that are built into a sleeve and then pressed into the spring eyes. Those inevitably die. When you reach out to Rough Country about your worn bushings, their “solution” is to sell you a set of their poly bushings which I’m sure they probably buy from someone else (I have no issue with them sourcing parts from others). What I have issue with is why do they sell poly as a replacement to their crappy spring bushings? Why don’t they get rid of the POS bushings, and just supply the poly bushings in their kits to begin with? It seems like a money scheme to me, to sell their lift as it is and then provide “great” customer service two years later when you come back needing bushings by selling you upgraded ones for a relatively fair price. Seems messed up to me. Not only that, but the actual installation process is beyond the expertise of most. Since the original bushings are pressed in, the bolt sleeves have to be pressed out, the rubber ripped out of the larger sleeve, and then the outer sleeve has to be cut with a Sawzall or something in order to get the spring eye fully empty. Not that it’s impossible to do, but it does take a good portion of a day to do this 8 times and someone with two year old springs simply shouldn’t have to.

Anyways, I had decided that 35’s would be in my future most likely, so I opted to try out BDS Suspension, which was highly spoken of for the most part.

The parts I used:

BDS 3.5” Heavy Duty Springs at all 4 Corners

Bilstein Shocks for 3-4” Lift

Rubicon Express U-bolt Kits

M.O.R.E. 3/8” Lift Shackles

8-degree pinion shims which were NOT enough.

The result of this install was underwhelming for sure and more frustrating than anything. One of my BDS springs sagged immediately, they overall rode very roughly especially compared to Rough Country, and overall I was just unhappy with all the money I spent. I called BDS to inform them of the sagging leaf and that the springs they recommend were way too rough. Their response was to drive the Jeep to the nearest BDS certified shop (50 miles away), possibly order a new spring, wait a week or two to get it, then drive back, and have to do the install myself. I pretty much ate my losses and didn’t bother with pursuing that. I’d recommend not buying from BDS. I decided that a third suspension overhaul would be in my future a few years down the road.

Here are the results of the suspension swap. The Jeep did grow taller, over the years I have figured out that Rough Country 2.5” and 4” kits both sit around 3” higher than stock. Every 4” RC kit I’ve seen looks the same as a 2.5”. Anyways, the BDS pushed me up to the 4.5” Range even though the springs were labeled to be 3.5”. I was sitting about as tall as a Jeep on Rubicon Express’s 4.5” kit usually sits.

Pictures from the Install...

IMG_0634.JPG

IMG_0635.JPG

IMG_0636.JPG

IMG_0637.JPG

IMG_0638.JPG
 
Jumping back into 2018 (following the headlight post), I kept the mods light as I had no job in school for the first half of that year. In May, I got a part time internship and the mods fired back up. I had always seriously wanted the Savvy LED tail lights, and also originally wanted the OR-FAB tire carrier. When the OR-FAB was discontinued in 2016, my long term plan was ruined. instead, I settled for the Bestop HighRock body mounted tire carrier. Part of the choice for Bestop was that I was not a fan of the relatively economical bumper mounted tire carriers. They never seemed to operate very smoothly. I also liked how the Bestop keeps the third brake light, which Texas began strictly enforcing in 2017. I am an advocate for the 3rd BL anyways, but didn't like the options I had for one on the Smitty so I ran without it for a while. I was given a warning at my 2017 inspection though so i had to figure out before the next year. Hence, the Bestop carrier was chosen.

Anyways, I bought the Savvy tail lights first. I could have bought them years ago, part of why I didn't is because they require relocating the license plate on a YJ, and they have no provision for a license plate light. Since the license plate is a flip-down style covering the fuel filler, technically I could have just drilled two new holes and mounted it lower, but there is still the issue of having no light, which cops will give you grief over for sure in Texas. Since the plate is a flip down, there is no pretty way to add a light to the bracket and hide the wiring. instead, I opted to move the plate to the tire carrier. Not my absolute favorite solution, but it's a great solution to a problem in most cases. I used the Smittybilt bracket for this, which turned out to be very nice and worked perfectly actually.

Here is a picture of the lights and a video of the hazards. I used to have way more pics of this project, but now I have basically nothing sadly.

IMG_0631.JPG

Turn Signal...


Hazards...


At first I tried the light bolts plate lights. They were pretty terrible, didn't light up the plate at all. I eventually got a plate light from Super Bright LEDs that seemed to be better. There are surprisingly few options for a good light that actually lights the plate, so at that point I was taking what I could get.

Here is the setup with lights on and brake lights on (without a third brake light yet of course):

IMG_1761.JPG

Next up was the tire carrier. As I stated, I decided to go with the Bestop.

At this time I still had the Smittybilt bumper and tire carrier that was a few years old. I didn't have the money to buy another bumper and honestly hadn't made up my mind on the choice for one anyways, so I ground off the tire carrier post on the Smitty and left it in place. I installed the Bestop carrier in an afternoon. Overall, it seemed okay, not great. I had known a few Jeepers with these and all seemed to like them, so I figured it would be a good choice for me too. One of my close YJ owner friends really liked his a lot so I pulled the trigger. After I got it mounted and for some reason it never really worked right. I followed the instructions exactly, putting the drilled holes exactly where the instructions said to. I believe something was manufactured incorrectly with the tire carrier frame itself, possibly the leg was too short. It eventually bent my tub over time but I ran it anyways since I hadn’t figured out what the alternative would be (what other carrier to use, bumper to go with it, etc). At first I thought the issue was operator error but my YJ friend came to visit and we spent a few hours messing around with it. We could not get it any better than I had it.

I contacted Bestop customer service. At first they seemed helpful but after a few weeks of back and forth, I didn’t really get anywhere and they stopped replying. A few months later the tire carrier was fully discontinued. On the bright side, it did provide me a spot to mount a TJ third brake light and passed inspection as a result. Otherwise, I regret ever purchasing it and I really don't have a good attitude about Bestop either after dealing with customer service.

Here are some pics from that day:

With Smittybilt removed...

IMG_1762.JPG

Final setup, with Bestop carrier on, bright license plate light, and all the brake lights lit up. Hard to be dissatisfied with those lights.

IMG_1763.JPG

Unfortunately I have no pics of the Savvy backup light portion but they were awesome too. The Savvy light install is a bit of a pain in the ass, but overall they are a nice piece.

In early 2019, I actually had to warranty out a Savvy lens. I was surprised, issues with them seem rare. I couldn't find hardly anyone on the forum who had ever had issues. Anyways, the exchange process sort of sucks. The girl I talked to told me my only option was to mail the lens to them (on my dime) and wait for a replacement. I requested new wiring connectors/terminals, received none. I moved after graduating college in December 2018, so I had a new address. I also mentioned that in the email and put the correct return address on the package....naturally, they shipped it to the original address I used to order from. I'm glad the Jeep was no longer a daily driver because that would have really sucked to have to buy other tail lights to use in the interim while waiting 3 weeks for a replacement lens and while waiting for it to arrive after going to incorrect address with no tracking. That whole experience also left a bad taste in my mouth, but I do like the product and would still buy them again if I needed them. The customer service certainly could have been better and they could have at least provided some more splices and listened to me when I gave them the updated address. To have to pay for the shipping on that adds salt to the wound.

The damage was from water entering into the brake portion through a crack in the seam between the backup light and the brake section. The weird part is the Jeep was rained on as it sat outside in December 2018. I moved it on a trailer and parked it in a garage at my apartment and found the leak in March 2019. So the water sat in there for 3 months and the light still worked fine. Then one random day, half the LEDs in that light went out, and then an hour later the rest were all dead. Very odd experience.

Picture of the water in the lens:

image1.jpeg

Overall I liked this setup, but the experiences with both Bestop and Savvy customer service left lots to be desired, and the Bestop part really disappointed. The Savvy failure was a bummer but those are rare so i think I was just the unlucky one. The replacement worked fine and still does, and the original one that didn't go bad, still worked fine as well. I ended up removing the carrier for the ARB bumper/tire carrier, and the Savvy LEDs for the Quadratec LEDs, which I will detail out later.

Edit: Editing to add some more Pictures I found of the Savvy Lights on my YJ. These were taken in 2020 and the Bestop Carrier had been removed, as well as the Smittybilt bumper. They were removed in preparation for the ARB bumper and tire carrier.

IMG_0095.JPEG

IMG_1848.JPG

IMG_0034.JPEG
 
Last edited:
  • Like
Reactions: Fouledplugs
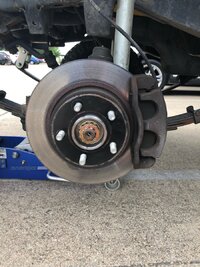
For the rest of 2018 I did no other modifications really, but I did make a decision to go all-in on the WJ knuckle swap. This is a conversion that uses Grand Cherokee WJ steering knuckles to convert a YJ/TJ/XJ to use the WJ knuckles, which brings along the WJ steering and WJ larger, much more powerful brakes. The knuckles are typically sourced from a junkyard. The WJ uses CV front axle shafts, which are a different length and as a result, when using YJ axle shafts on the WJ knuckles, the unit bearings have to be spaced out by quarter-inch spacers welded to the knuckles. This then messes up the alignment between the caliper and the new rotor. To fix that, caliper spacers can be used to space the caliper out 1/4”. Another solution is to use 2000-2006 Jeep Wrangler TJ unit bearings which are ¼” more shallow. This makes it to where everything will work if using the WJ stock rotor.

Now, the WJ uses a different wheel bolt pattern, 5x5” instead of 5x4.5” like the YJs use. So, rotors need to be drilled. They can also be purchased from Iron Rock Offroad. Another option is to use rotors from an Explorer Sport Trac, but the unit bearing flange will need to be ground down to fit inside the rotor hat. The rotor hats are also deeper, so you have to space out the unit bearing more to line the rotor up. I’d say the drilled rotors is a better option.

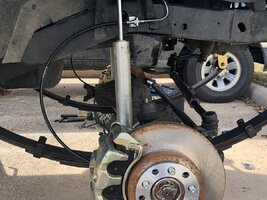
For calipers, I took the calipers from the junkyard, sent them in as cores and bought new Centric Premium brand calipers from RockAuto. Also, due to the position of the brake lines on the calipers and the way they are clocked, the brake lines need to be much longer on a YJ. I ended up reworking the brake lines up by the shock tower, and then let the soft brake lines form a C shape down to the calipers. It worked fine and you can see it in the first picture.

Steering:

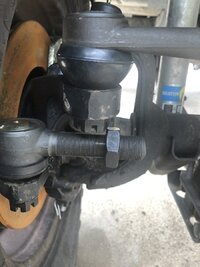
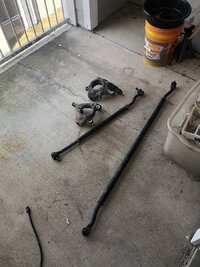
Steering is tricky. WJ steering is too long because they have wider axles. First off, the tie rod on a WJ mounts below the knuckles. The mounting points on the WJ knuckle are lower than on the YJ knuckle. This means that stock steering mounted to a WJ knuckle, and placed on a YJ, will not fit due to the leaf springs. So, the tie rod has to be moved up above the knuckle. Because of this, the drag link also has to be moved up above the knuckle. Because you’re flipping the tie rod and drag link, the tapers have to be redone. I traded my knuckles with Black Magic Brakes who happened to be pulling some knuckles off of a TJ that had the stock taper, flipped on them. He has a way to basically erase the stock taper, and add a stock tapered sleeve back to the knuckle in the opposite direction. So I ended up with knuckles that had that operation done to them. I also used steering from that setup that was DOM tube, tapped for WJ tie rod ends, and so I was running stock WJ tie rod ends on custom steering.

I tried using one-ton tie rod ends but since I had to mount them over the knuckle, the body of the passenger tie rod end interfered with the drag link end up above it. I’m not sure how people run one-ton steering on this setup. Maybe they taper the lower TRE hole deeper than mine was tapered. One of the pictures shows what I mean.

The drag link being mounted above the knuckle then makes it very tall for the Jeep. The pitman arm needs to remain stock, or even be flattened out to give even better steering clearance. With 4.5” of suspension lift, my drag link was still higher at the knuckle than the pitman arm, and sloped downward when going over to the pitman. Ideally this swap should only be done on Jeeps with lots of lift.

After it was all said and done, the brakes worked well, but the steering was very darty. After literally probably spending 3 grand on this swap, I haven’t been very happy with it. It’s aligned properly, yet screeches on tight turns, handles vaguely on the highway, etc. I am planning to remove the parts eventually and go back to stock steering and the Vanco 15” Big Brake Kit.

I don’t have a lot of pictures from this swap either but here are three. The third pic shows what I was talking about with reworking the brake lines. I used Rubicon Express brake line extensions to get the hard lines where they are.

Tie Rod End/Drag Link End Interference....

image1.jpeg

Welded Knuckles and Steering

IMG_0115.JPG

The Setup Installed (and Reworked Brake Lines)

IMG_0116.JPG
 
  • Like
Reactions: Fouledplugs
Exhaust

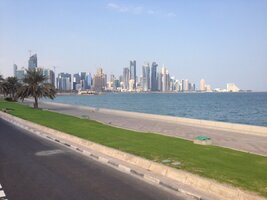
When I bought the Jeep in 2013, it had a rattly catalytic converter. Everything worked fine, it was just annoying. I drove it around for a few months that way and then accompanied my mom on a trip to Qatar in November '13 (pic of Doha skyline below for good measure).


IMG_1038.JPG


When I got back from the trip, my dad surprised me by having me go run an errand so I could drive the Jeep. I noticed the rattle was gone! He had gotten the cat swapped while I was away. That was nice to have taken care of for sure.

Later on in mid 2014, my OEM muffler started rattling against the heat shield mounted to the tub. I wasn't really sure why but it sure was annoying. I think part of it was it was not super secure on the newer cat (and it was about as tight as could be). Not knowing any better, I went with a Flowmaster Super 44 muffler and a Walker Tailpipe from O'Reilly. I was excited at first, but after a few months on the highway, that wore out :ROFLMAO: Overall it was loud, drony, and while it sounded 'cool' at first, it sure got old quick.

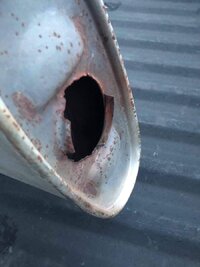
In Spring 2015, I bought the Dynomax 17309 catback. I saw a few folks give this one good reviews and said it was somewhat quiet but with good sound. I was pleased to get it installed and hear what it sounded like - exactly as described. Decent on the highway, not drony, nice sound at idle and while driving. Sadly, this one only lasted about two years. After that time period, the thin sheet metal where the cat enters the muffler had torn and allowed the system to leak. When I finally took it apart to replace, the cat fell right out of the muffler. Not sure if that was a fluke or what.

Here is the Dynomax muffler after removal:

IMG_1775.JPG

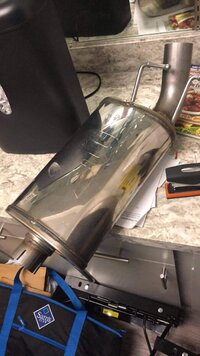
I decided to replace this kit with the Magnaflow 15853 catback kit. This one is all stainless, still is not too drony, sounds good, and appears to be much better material than anything I had previously. The muffler is nicely smaller than stock but not too small to be super loud. The small size helps it to not rattle against heat shields or anything else down there. The picture only shows the muffler, I don't have one of the whole system before I installed it. It's pretty expensive at about $550 but it does seem to be good quality and so far, it is going strong. It also has a nice downward angled tip like stock, rather than blowing straight back like the other kits do. Overall, I am happy with this one and do recommend it to others who ask.

IMG_1774.JPG
 
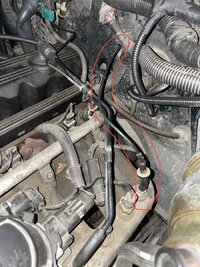
Following the exhaust replacement, I decided to delete the problematic vacuum CAD setup from my front axle. Mine actually hadn't worked in years. My suspension was too tall and the vacuum hoses always came off the motor, and even when they did stay in place, the actuation of the motor was very inconsistent, like most YJs. Rather than even begin to consider repairing that system, I opted to go with the TJ/XJ one-piece axle swap.

Many people opt for the posi-lock or perma-lock kits. These work fine, get the job done, but the functionality wasn't what I wanted. The posi-lock kit includes a cable that switches the vacuum actuated setup to now be manually controlled by the driver. One benefit is that this allows for the driver to operate in a simulated 2Lo mode, by putting the transfer case in 4Lo and not engaging the front axle with the cable. Kind of cool, but the rest of the posi-lock details are cons to me. It has a giant red knob on the end of the cable that I really don't want on my non-red dash. It requires drilling a large hole in the firewall for the cable. It requires the driver to do the work every time, which I don't want to do. It can be finicky to operate. The perma-lock kit is basically a simulation of the TJ axle shaft swap. It locks the front passenger axle shafts together permanently, and can not be unlocked. The benefit to this is easier install than the TJ setup, since you don't have to remove the front carrier, install a special seal, etc. All you have to do is open the CAD, replace the cover with the permanently locked CAD cover, and go. Pretty simple, my issue with it was that it keeps the two separate shafts and permanently locks them. I feel it is stronger to have a one-piece axle shaft.

The TJ/XJ Setup:
Essentially the one piece axle swap from a TJ eliminates the two piece axle shafts from the YJ front axle. The parts needed are as follows:
-TJ/XJ passenger side front axle shaft (1996 and up are best for the larger u-joints!)
-TJ/XJ driver side axle shaft (only needed if seeking 1996+ - please don't get the larger u-joint shaft on one side and leave the other side stock! Nothing is more hack job than mismatched axle u-joint sizes).
-Napa 11800 axle seal (to go in passenger side of diff)
-Chrysler J8134473 Transfer Case Switch (for a TJ/XJ, it is electronic and replaces the old vacuum switch to keep the 4X4 light functional)
-18AWG wire (black is best to match stock)
-Delphi 2-Pin Male Weatherpack Plug with Male Terminals (typically male terminals go in female plugs but for this job, male needs to be used in a male plug)
-G2 Axle Block Off Plate (can just reuse stock CAD if desired, I wanted the cleaner look of a flat plate).
-New Cork Gasket for Block Off Plate
-Gear Oil

The Conversion Process:

The swap was pretty easy, but time consuming. Here are the steps:

-Jack up front end, set on jack stands, remove front wheels
-Remove front brake calipers and pull off rotors
-Undo front axle cotter pins and remove axle nuts to separate axle shafts from unit bearings
-Open up the CAD (Have a bucket ready, gear oil will drain out)
-Remove diff cover (Have a bigger bucket ready, even more gear oil will drain out)
-Remove Bearing caps to differential, remembering where each bolt goes and keeping caps in the proper orientation to reinstall them exactly the same way later
-Remove intermediate axle shaft by sliding out to passenger end of axle
-Install Napa Seal in passenger side of differential - NOTE - the axle tube is not machined for a seal. The Napa seal is the perfect OD for the axle tube and perfect ID for the axle shaft. It will theoretically pound all the way down the axle if you don't stop, so make sure you stop at the point where it rides on the machined portion of the axle shaft.
-Swap out driver side seal too since you're in there
-Install new axle shafts
-Button up the Diff and CAD
-Install unit bearings, torque unit bearing axle shaft nuts to 175 ft-lbs
-reinstall brakes and wheels
-Remove all the old vacuum crap out to the transfer case and engine.

The 4X4 Light...

Some people would say "I know when I'm in 4WD, I don't need no stinkin' light." While I don't necessarily disagree with the truth behind that statement, I like things to work as intended. For that reason I chose to rework the 4X4 light circuit to keep it working properly.

The factory 4X4 light on 92-95 YJs with the electronic gauges is pretty simple. The light always has fused power with the key is in the ignition. The light is controlled by the ground circuit. The light's ground runs out to the factory 4X4 switch mounted at the CAD. The second wire at the CAD carries the lamp ground out to the grounding point. When the Jeep is put in 4WD, the forks in the transfer case push a button on the 4-port vacuum switch, which connects engine vacuum to the CAD. The vacuum at the CAD motor then slides the CAD fork over, pushing the button on the switch. This connects the two wires together, and the lamp is then grounded and illuminates.

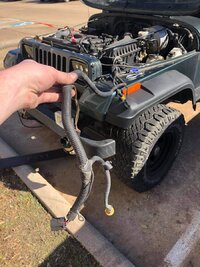
When you do the TJ axle swap, you get rid of this setup. The way the TJs and XJs have their light work from the factory is similar, except the wiring goes to the transfer case. The switch I listed is installed where the factory 4-port vacuum switch is on a YJ, and shifting into 4WD pushes the button on that switch, and the lamp is then grounded just like the front axle setup. The only process to making the lamp work is extending the wires to where they reach the transfer case, installing the switch I listed, and crimping on the Weatherpack plug I listed which then plugs into the switch. It is seriously easy as can be. Wrap any wiring in loom to protect it and zip tie it to the other transmission looms to keep it safe.

The end result is that when you put the Jeep in 4Hi or 4Lo, so long as the internals of the transfer case move properly, the 4X4 light on the dash will illuminate to reinforce the shift you made. It will shut off when transfer case is in neutral.

Overall I am very pleased with this one, I consider it OEM+. It is how the Jeep should have come from the factory, it works, no issues, complaints, etc. So much more reliable than the vacuum mess and it's nice to remove the clump of vacuum tubes and never have to worry about 4WD leaving you stranded.

Pictures:

Here you can see the finished front axle, no vacuum tubes, no wiring, and no gigantic flying saucer of a vacuum motor mounted to the axle. Much cleaner.

IMG_1830.jpeg

Here is the TJ transfer case switch, with my extended wiring ran to it.

IMG_1835.jpeg

Here is the vacuum tubing at the intake manifold. From the factory, This port tees off to feed the 4WD and the vacuum operated heater entry door. I repurposed this to be for the heater only, now that I have no need for vacuum 4WD. Works flawlessly.

IMG_1838.jpeg
 
  • Like
Reactions: Fouledplugs
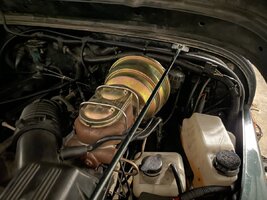
Dave's Customs Unlimited Brake Booster & Master Cylinder

My next 2019 project was to replace the brake booster and master cylinder with an "upgraded version". if you recall from Post #8, I was running the booster and master cylinder from a 95 4.0L YJ. With the bigger WJ brakes (and Vanco big brake kit when I had it), braking in the rain was sort of dangerous. I now had so much brake power that when streets were slick, the brake pedal was more of an on-off switch. It was very difficult to use the brakes without locking them up and sliding. I had a very few close calls where I nearly plowed straight into people at 30mph. As a result, I wanted to dial the performance back a bit, while still being good enough to lock up in all dry conditions. As such, I decided to try the Dave's Customs kit. When ordering this kit, you need to choose a master cylinder bore size. I opted for 1" as that is the proper size that flows the correct amount of fluid and produces the right amount of pedal effort for both WJ calipers and the Vanco brakes.

One of my YJ buddies came from out of town and we knocked out the install in a few hours and bled the brakes. He brought his awesome Eastwood brake line flare tool and flared me some custom lines in minutes. I definitely need to get that tool.

We took the Jeep out for a drive and honestly, the results were depressing. I was no longer able to lock up the tires. My friend thought it was decent but he is considerably larger than me and definitely has more power in his leg than I do. The most I could get was some light chirping. When braking, you have a nice amount of vacuum at first, and then about halfway into the pedal it feels like you run out of vacuum and have a bad booster. The pedal feels like a brick wall and is very difficult to get any decent braking power out of. I also noticed that after letting off the brake pedal, it feels like vacuum is still applied for a second or so. The rod is adjusted properly so I'm not really sure what else should have been done. I reached out to Dave to make sure I had received the proper master cylinder, and I had. I checked the forums and Facebook and found some other negative feedback that matched mine. Much worse braking power than stock, hard pedal, etc.

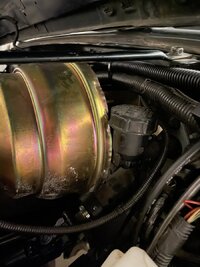
I also had to grind a considerable amount out of the outer shell of the booster to avoid it hitting my clutch master cylinder. Even so, it still interferes. This is definitely not a perfect swap for a YJ...in hindsight, I should have just gone back to the stock 87-94 single diaphragm booster and master. Not long after the Dave swap, I went ahead and purchased those parts and considered the Dave setup a loss.

Here is the Dave's setup installed

IMG_1839.jpeg

Here is a picture of the interference between the clutch MC and the booster. I'm pretty certain I'd have a busy day if I needed to change the clutch MC.

IMG_1840.jpeg

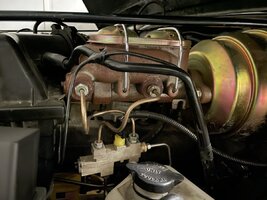
Here are the reworked brake lines using nickle copper lines and the proper tube nuts to fit all the ports.

IMG_1841.jpeg

Another really disappointing aspect of this brake booster kit is that they offer no options to cover the giant firewall hole. The boot doesn't reach and the factory booster boot doesn't work either. Seriously, seeing how this swap turned out makes me wonder if they've actually ever installed it on a YJ, lol. Granted that's a joke because they advertise it on a YJ in the pictures, but still....

IMG_1842.jpeg
 
Last edited:
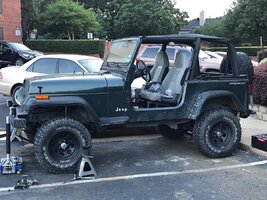
Body Lift

Many people are body lift haters. For a long time I was too. At first, I didn't see the benefits. I was all focused on the body lift buttcrack. In reality it opens up so many more opportunities: better uptravel, more clearance for larger tires, less bump stop (see better uptravel), room to do a tummy tuck and motor mount lift more easily, and the best part, they are super affordable!

I went a bit different route than most. I chose the Savvy 1-1/4" body lift meant for a TJ. I went this route because the pucks are a nice anodized aluminum which means they will never crack, rust, or deteriorate, in general. The pucks and bolts are the same on a YJ as a TJ, so it mostly works. The downside is the grille bumpers they give you in the Savvy kit are meant only for TJ and don't work on a YJ. That meant I still needed to solve the grille snubber problem. I opted to also buy the Rough Country 1-1/4" body lift, and stole the grille bumpers out of it. I found someone who was capable of making his own bumpers and sold the kit to him for cheap. Overall, it worked out.

Pic of grille support blocks

IMG_1843.jpeg

Pic of body lift in one corner. My ARB rear bumper hides it well.

IMG_1844.jpeg

Tummy Tuck:

To go with the body lift, I opted to go ahead and do a tummy tuck as well. I had several reasons:

1. To bring shifters back to normal height after body lift
2. To Maximize Clearance under the skid plate
3. Why not?

i chose the Undercover Fabworks Extra-Clearance Skid Plate in 3/16" Steel. This one gives you 1-1/2" clearance above stock. When you consider that I installed a 1-1/4" body lift, and their 1/2" tuck works on a stock jeep with no body lift, I knew I'd be good with at least 0.25" to spare. And, the drivetrain was then 1/4" closer to the tub than stock, which helps maximize the length of the shifter, which can be a reach for some and is nice to have it as long as possible.

The install was simple, I sprayed the plate with a few coats of Herculiner, and bolted it right up. I also opted to install a new Mopar rubber transmission mount at the same time. It was one of the last few I could find.

Side profile of the skid plate. Hangs down noticeably less than stock.

IMG_1845.jpeg

View of the skid from behind. It has nice raised edges to increase rigidity.

IMG_1846.jpeg

Overall the UCF was nice quality and a good purchase. It got the job done, and put my transmission back to a good relationship with the tub of the Jeep.

1" MML

To go along with the tuck and the body lift, I completed the trifecta with replacement 1" motor mounts from Brown Dog. I already had their full engine bracket and stock height mount kit from years prior, so this was a very simple swap.

When you examine a Jeep's exhaust, it's mounted to various things. First, it starts at the engine which is mounted to the frame. Next, it is hooked into a bracket on the transmission, also mounted to the frame. Further, the muffler is hung off of the tub, and finally, the frame supports the tailpipe with a hanger.

With a body lift, you put odd lift on the muffler. With a tuck, you fix the issues in the muffler area by raising the transmission to be close to the same level again. However, you now put stress on the header/exhaust manifold because the engine is still at stock level. The MML brings the engine up to get the exhaust back into a good spot at all 3 locations. Finally, this rotation of the exhaust upwards makes the tailpipe happy in its mount as well. At this point, with all these mods, Installing a MML only makes sense.

The MML also brings the engine upwards to clear the fan shroud. Typically redrilling the radiator to mount the shroud is no big deal, but it's nice to avoid it if you can do so by bringing the engine up with a MML anyways. For me, it made sense to go this route. Everything has worked flawlessly ever since.

Pic of the MML and Brown Dog's Engine Bracket. I opted for rubber to complement the rubber Mopar mount nicely. Vibes are minimal, I am happy.

IMG_1847.jpeg
 
  • Like
Reactions: Fouledplugs
Suspension (Again!)

For mid 2020, I decided I had enough of the rough riding garbage BDS 3.5" setup I installed in 2017. It rode rough, one leaf sagged, it didn't flex hardly at all, and just overall sucked on my Jeep. After reading nothing but praise for Old Man Emu, I opted to go with their parts.

Old Man Emu does NOT make it easy to select parts for suspension. They try to by selling one "kit" and offering it in medium or light load, but there's more to it than that. Most everyone does not buy the kit, and opts to buy their own selection of parts instead.

First off, they sell 3 springs:

CS014F - 4-leaf spring, around 140 lb/in spring rate - OME calls it their "heavy duty" front spring (it is the only front spring they offer)
CS036R - 5-leaf spring, around 180 lb/in spring rate - OME calls it their "medium duty" rear spring (it is the heaviest rear spring they offer)
CS037R - 5-leaf spring, same spring rate as 36R (around 180 lb/in) - OME calls it their "light duty" rear spring (it is the lightest rear spring they offer)

Where it gets confusing is that the front spring that they call heavy duty, is the only front spring they sell. Their wording would lead you to believe there are other front spring options; there aren't. What's also weird is that their "heavy duty" front spring is actually weaker than both rear springs they offer.

What many opt to do, myself included, is install their heaviest duty spring at all 4 corners. All YJ springs are the same length, so any rear or front spring can be installed in any location. So I went with 4 36R springs. Here are the parts I used.

List of Parts:
-4 36R springs
-2 60098 Front Shocks
-2 60099 Rear Shocks
-2 OMEGS11 Greasable Shackle Kits
-4 OMESB87 Spring Bushing Kits (Made for OMEGS11)
-Rubicon Express RE2420 and RE2421 U-bolts Kits for Dana 30 & 35

Overall the ride is INCREDIBLY smooth. I did not have my hopes up when I was waiting on the parts to arrive. I have found that other people have vastly differing opinions than my own about ride quality, so I was truly expecting nothing great. The newfound smooth ride was absolutely mind blowing. My YJ glides over bumps the best it possibly could at this point.

The Jeep sits pretty much perfectly level as it is currently. I worry that with people or towing, it will have anti rake or squat, which I don't want. I will evaluate later: if it squats when loaded, I will likely swap the fronts to the 14F springs. It will have some rake, but that's okay. We'll see, for now it will keep 36Rs on all 4 corners.

Picture Time!

Here was the YJ with BDS 3.5" springs, 3/8" MORE shackles, and 1.25" Body Lift. It looked ridiculously tall. Also, damn, those 6" wide flares look way too wide.

IMG_4332.JPEG

Here is a comparison of OME to BDS. The only differences are the springs, shocks, and shackles. It's a pretty big difference when looking at the tire-fender gaps. It measured around 1.5" lower after swapping to OME. Still a bit high for 31's but that's ok, it's being built for 33's.

mixgramImage.JPEG


Here are a bunch of pics after the OME swap. I think it looks MUCH better and the 33's will be right at home. The 31's look a bit close to the fender flares in some spots but part of that is just the way the pic looks and the fender flares are 6" that I no longer have. It looks great in person.

IMG_0004.JPEGIMG_0088.JPEGIMG_4643.JPEGIMG_4648.JPEGIMG_4650.JPEG

Overall I give OME a 10/10 for their suspension products. I would say the clarity on details and specs of their products could be better, but I did figure it out and was finally able to make an informed decision.

If you didn't notice, I also changed the ugly smoke housings back to amber. I thought they were cool at first, but they really didn't look right after a while. The lack of contrast was very blah. Especially at the side marker areas.
 
  • Like
Reactions: Fouledplugs
NP231 Upgrades

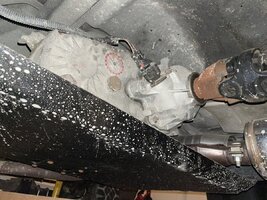
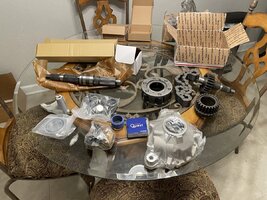
In 2019 and 2020, I ordered various transfer case parts. I still haven't installed them yet, but will soon. In 2014 I installed a Rugged Ridge SYE into my transfer case so that I could install a double cardan rear driveshaft after lifting the Jeep 2.5 inches with Rough Country. I've decided that for strength, reliability, and quality of parts, I'm going to rebuild the transfer case, as well as go with a better quality SYE and upgrade the strength of parts.

I purchased:
-JB Conversions Standard SYE (still lower profile than all other standards because of their high clearance yoke)
-JB Conversions Master Rebuild Kit
-6-Pinion Planetary Assembly from eBay
-Wide Chain Kit
-17833 Upgraded Range Fork from Allstate Gear (better design/shape for smoother shifting)

I will likely install these parts in the fall of this year. I'm busy making a bunch of other changes and not driving the Jeep right now, so no rush yet.

IMG_1863.jpeg
 
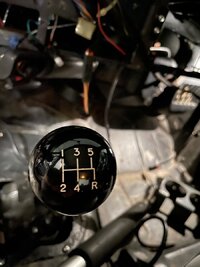
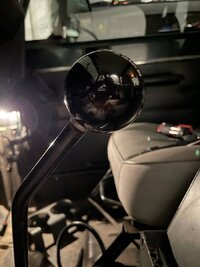
Shift Knobs

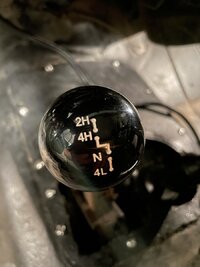
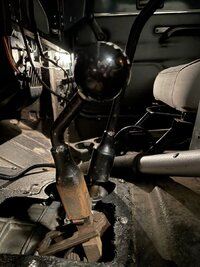
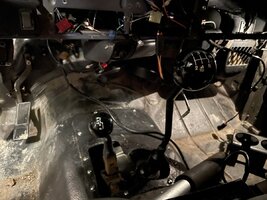
Later in 2020, I decided I had enough of mismatched shift knobs. I was running a very pitted aluminum transmission knob from B&M, and the stock transfer case knob. I opted for the black 8-ball style from Core Shifters. The great thing about these is they are actually threaded for a YJ, so they fit perfectly and don't need any threaded adapters. I find the adapters never work. They come loose, get stuck inside the knob, etc. These are made for the YJ, match each other, their threaded jam nut fits perfectly and overall, they are decently priced at around $40 each. I highly recommend these for YJ owners. Super sleek look too.

Please pardon the very messy Jeep I took these pictures in, it is really haphazard in there with the dash being torn apart as I work on a lot of projects at once.

IMG_1865.JPEGIMG_1867.JPEG


IMG_1866.JPEGIMG_1868.JPEG

IMG_1864.JPEG


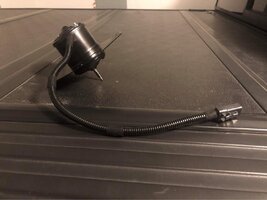
New Blower Motor (and improved plug connector for it)

One day as I was bored in 2020, I decided to replace and clean up my blower motor and its wiring. I had changed the blower motor in 2015. It still worked fine 5 years later, but I had used really shoddy crimp connectors back then, and overall really did not know what I was doing with electrical work. I was surprised that motor kept working.

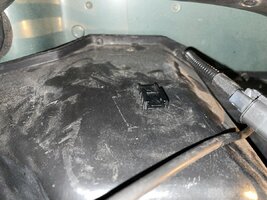
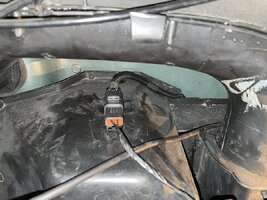
Anyways, I decided to remove it, order a new VDO PM143 from RockAuto, and made the connection really nice this time using Deutsch DTP connectors (capable of 25A of current). I wrapped the wires in harness tape and then slipped them inside of a loom. I taped the loom and installed the heater box with the motor installed onto it, back into the Jeep. I then drilled small holes on the surface of the heater box and installed a Deutsch Christmas tree fastener clip meant for their DTP plugs. I think the whole thing looks factory or better. It's really amazing the difference in results you can produce when you use better/proper tools. Especially with wiring work.

Blower Motor ready to go...

IMG_1836.JPG

Mounting Clip installed on heater box

IMG_1871.jpeg

Plugs plugged in, and fastened down in place. Rock solid!

IMG_1870.jpeg