'95 Sahara, 1st YJ

I decided to remove the shifters so the carpet will lay flat and I can cut it more accurately to fit under the boot. I looked up how to remove the shifter. It’s great what the FSM and a couple online videos can show you in 15 minutes!

Inside the shift tower was this ugly thing, which I suppose is a decomposing bushing.

695129AB-FFBC-465E-AC26-B2EC4D5ACF65.jpeg


I found a Crown part that looks like it, so hopefully that will fit the bill!
 
  • Like
Reactions: ACKyj
I got carpet from Stock Interiors and finally started installation. It looks good but will require a fair bit of trimming.

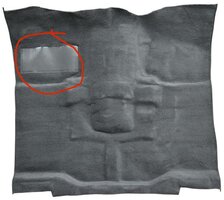
I started with the front floor section. I removed both shifters so the carpet lays flat. I used a small plastic sheet to cover the shift tower opening and held it down with a rubber band.

The carpet was well-molded to the floor pan, but there’s excess material on one side, so I have to decide whether to trim off a few inches including the nice binding.

Getting the shift boot back on after trimming a hole for the shifters was a bit challenging. There’s not a lot of room for error if you want the boot to anchor and totally cover the edges of the carpet. So the hole in the carpet has to be fairly small. But getting the lower shift boot through that hole and under the carpet takes a fair bit of manipulation. In addition, the lower shift boot is filthy with old RTV or some tar-like adhesive.

I covered the carpet for 3-4” inches around the hole with painters tape so the tar wouldn’t stain the brand new carpet as I worked it though.

Once the lower boot was anchored, the upper boot went on and pinched the carpet to hold it in place.

F2CC5F5E-0521-4C02-8569-FA47C857C2C7.jpeg


AA295DE7-703C-422E-AB4C-FE237C792548.jpeg
 
  • Like
Reactions: SirDoopYJ
Stock Interiors offers these cool floor mats as well. Just about any color you want, and you can choose a different color for the binding. The Jeep logo is well worth the extra $$.

The seat bracket was scratched and a bit rusty, so we freshened it up with a Rustoleum Hammered matte aerosol paint. I like the look better than plain black. As always, thorough prep is the key to every paint job!

5A6A2BDC-E40B-4ECA-987E-0379FE70EF0F.jpeg


EC76C8D0-058D-4F63-833A-D94812C7A346.jpeg
 
  • Like
Reactions: SirDoopYJ
I looked into getting a console, mainly for the cup holders. But most of the aftermarket options get bad reviews and don’t even have decent cup holders.

So instead of spending $150 or more for junk, I went with a steel cup holder from Dogfox Industries. Easy install, fits a large YETI, and only $40.

B73B307C-46D2-422F-BF76-BE50B27F804B.jpeg


580BC1E4-91F0-40D9-A167-A427889711D9.jpeg
 
  • Like
Reactions: 1992sahara
It’s been awhile since my last post; I’ve been driving the Jeep a lot more than working on it since then. It’s really nice to have a fun jeep to get around town, even daily driving. The repairs and mods are fun in their own right, but I’m grateful that it starts every time and turns heads everywhere I go. I took the doors off a couple months ago won’t put them on until winter.

I took my daughter to a local dealer to buy her first used car and the salesman swarmed us immediately and asked if I wanted to trade in the Jeep…. “In your dreams” was my reply.

That said, I still have plans. I need to fix the rattling tailgate so I can mount the spare because my wife finds it less junky that way. The blower motor wiring has a short and blows every fuse; I’d like to get that working before winter.

I tentatively plan on getting OME front springs and shocks all around. I replaced the rear DS U-joints and it improved but did not resolve the vibrations, so a SYE/DC driveshaft might happen.

The current little project was adding entry guards to the door sills; there was a filthy decaying protective film I had to scrape off, plus a few areas of bare metal, but the new hardware is certainly… shiny.

IMG_1450.jpeg


IMG_1448.jpeg


IMG_1449.jpeg
 
I had to daily-drive the YJ for a couple months as I found time to rebuild the steering on my 262K-mile Civic, but now it’s the Jeep’s turn.

I haven’t installed the rest of the carpet because I want to get the sport bar off first, and I’ve been stymied by half of the bolts being stuck. I got the right rear one off by sticking a heat gun and lots of Liquid Wrench up from underneath, but when I went to repeat that on the left rear, I realized the fuel filler hoses were in the way, and by the way there’re fairly strong fuel fumes back there…

So then it’s drop the tank which reveals that the skid is nearly rusted through on the exhaust side, no big deal I’m sure.

71901293023__38CFA8C5-A6D5-4249-8F2F-92BBD974A1D4.jpeg


71901294874__F9ADF52E-0CC6-43A5-ACEC-DEFF10A40229.jpeg


IMG_1651.jpeg


Oh and now’s a good time to put a stop to the rust on the crossmember in front of the gas tank. Oh, that means I need to remove those 2 body mounts, which means I need to loosen all the body mounts so I can jack one side up at a time. Oh d—- I sheared off two of them…

IMG_1655.jpeg


IMG_1669.jpeg


IMG_1675.jpeg


The moral of the story is: installing carpet in a YJ involves a lot of work.
 
I successfully removed the sport bar today. The best method for removing the stuck bolts was to cut off 2 or more sides of the head and the underlying washer with a Dremel, then use the impact wrench to spin it out. I suppose reducing the surface area where the head presses into the body was the reason. The heat from cutting probably helped too.

IMG_1682.jpeg


IMG_1687.jpeg
 
I would definitely go back to stock length 4” shackles, but I’d keep the Old man emu lift and run 31-10.50 tires.
thats what I run. OME 2.5" with 31's. A great look, a good ride. Its what all YJs should have come from the factory with.
 
  • Like
Reactions: ytradio
thats what I run. OME 2.5" with 31's. A great look, a good ride. Its what all YJs should have come from the factory with.
Yeah I agree. The YJ has good traits, its a great platform to build off of. But in my opinion in its stock form it has room for vast improvement. A guy that wants an all stock YJ is fine if that’s what he wants, it’s his business. But mine is so far gone I see no reason not to build the Jeep that should have been.
 
  • Like
Reactions: machoheadgames
@TRevs I can’t really tell from the photos, was the footpad on your carpet kit sitting flat on the floor like it’s supposed to?

I’m finally working on installing my Stock Interiors carpet kit as well, and mine starts to go up the transmission tunnel when the carpet is set in the right spot (molded areas sitting where they go). Looks weird.

IMG_2467.jpeg
 
@TRevs I can’t really tell from the photos, was the footpad on your carpet kit sitting flat on the floor like it’s supposed to?

I’m finally working on installing my Stock Interiors carpet kit as well, and mine starts to go up the transmission tunnel when the carpet is set in the right spot (molded areas sitting where they go). Looks weird.

View attachment 122097
I’m not totally sure; i can look closer tomorrow, but in post 66 of this thread you can see the carpet in the background, and I think the vinyl foot pad stops before climbing up the side of the tunnel.

However, the carpet is not centered well; with all the molding conforming to the tub, the edge of the carpet on one side climbs 3” up the side of the rocker panel while on the other side the edge up the carpet butts up flush against the rocker. I think their molding is not do e with a high degree of consistency or precision.
 
  • Like
Reactions: machoheadgames
@TRevs I can’t really tell from the photos, was the footpad on your carpet kit sitting flat on the floor like it’s supposed to?

I’m finally working on installing my Stock Interiors carpet kit as well, and mine starts to go up the transmission tunnel when the carpet is set in the right spot (molded areas sitting where they go). Looks weird.

View attachment 122097
Macho, even with the high end molded carpets, the pro’s that I have known usually had to use a heat gun to get the results that they wanted. I was also told that they did not recommend the average diy guy try this as it is easy to melt something that you don’t want to. The new carpet in my Camaro was like that and I just lived with it. But after I few months it seemed to be fine.
 
  • Like
Reactions: machoheadgames
Looks like it only goes up the tunnel about 0.5-1” after all. Not too bad. It seemed more drastic yesterday. I will say the carpet starts to fit the floor better after it’s sat there a bit. The worst part of my install by far is the baggy wheel wells. I don’t really have a solution to that, but I’m going to have speaker boxes in the wheel wells and maybe storage boxes on top so it won’t really matter how janky it is I guess.

Btw, @TRevs i really like those floor mats! Never even saw SI had those. I’m going to order some eventually, they look like they’ll fit way better than my rubber mats. The rubber is nice but it’s a tight fit and starts to bulge inwards at points. Carpet seems better especially since I’m not going to drive in rain anyways. Great suggestion on the mats.
 
Having no prior experience with this sort of thing, I found the molding fit to be somewhere between acceptable and good.

The bigger problem is the large amount of trimming needed; complex shapes around the shift tower, roll bar mounts, rear of wheel wells, etc.
 
  • Like
Reactions: machoheadgames
Having no prior experience with this sort of thing, I found the molding fit to be somewhere between acceptable and good.

The bigger problem is the large amount of trimming needed; complex shapes around the shift tower, roll bar mounts, rear of wheel wells, etc.
Yeah I don’t even know where to begin on the main floor carpet where it meets the rollbar bases. I feel like I’m going to cut a bunch of it off in that area. I already have the wheel wells and the tub walls covering most of that area, I can’t really fathom why I’d need so much additional carpet from the main floor going into the roll cage.
 
Yeah I don’t even know where to begin on the main floor carpet where it meets the rollbar bases. I feel like I’m going to cut a bunch of it off in that area. I already have the wheel wells and the tub walls covering most of that area, I can’t really fathom why I’d need so much additional carpet from the main floor going into the roll cage.
I’m saving that part until the end, and I’m going to leave the seatbelt and sport bar off. I’m planning on leaving enough material there to tuck under the rear pieces to hold them down.
 
  • Like
Reactions: machoheadgames
I got the roll bar back in and trimmed the carpet to my satisfaction.

Recommendations: sharp razor knife, and leather gloves.

IMG_1739.jpeg


IMG_1740.jpeg
 
  • Like
Reactions: ytradio