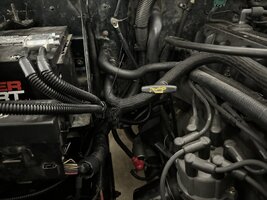
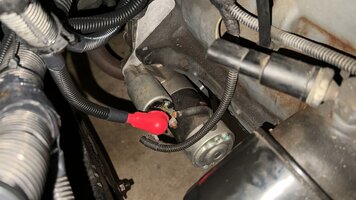
1994 Hunter Green SE “Back to Stock” Thread

That's what I did, though I started with an already intact harness. Took it down to my local Orileys and one of the more helpful counter guys spent 20 mins with me getting the materials together and building all the battery cables from scratch. Think it was about 60 bucks total.
Yeah, I ended up finding some 4Ga welding wire (red and black) long enough to do the 3 cables I need to do. Forgot I bought those 3-4 years ago because I already didn’t like the thicker cables I made before then and wanted to change them out. The stock cables are 4 gauge to starter, 4 gauge to engine block ground, and 8 gauge to the firewall ground, so I guess the firewall will get an “upgrade.” They all still fit in the small section of loom at the battery tray so it’ll work.

I need 2 more ring terminal lugs in 4 gauge (for the two grounds) and then I can terminate and hook them up. I have all the parts for everything else and I’ll cover it all in loom and a bit of tape when I’m closer to done. I’ll share how it turned out when done. It will basically be identical to stock except for being welding wire, that one upsized wire, extra loom vs stock, extra tape vs stock, and military terminals instead of stock.
 
  • Like
Reactions: DOWNS and ytradio
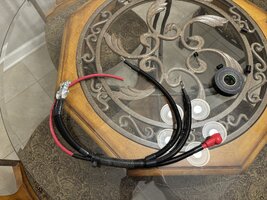
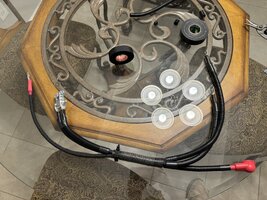
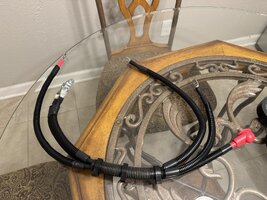
Battery cables are done. The lugs came in this evening and so that was today’s project.

I basically taped a power and two grounds together, snipped them at the rough locations, then fine tuned those by mocking it up in the Jeep multiple times and following the factory routing to see where things landed. Take photos of the lug on the cable loosely, then remove it and crimp it in the right orientation. Tedious, but not hard at all.

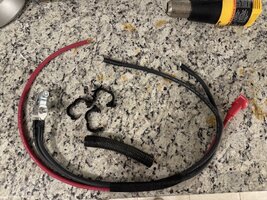
I reused the factory loom and clamps for the battery tray. This will hold the harness snug and also served to help make sure I cut things to the right length.

I taped the bundle in the middle to keep things from shifting, and then I taped every individual cable just to add some extra puncture/cut resistance. Lastly, threw on some 7/16” ID split loom and taped the ends with polyken tape.

Now I just need to finish up the dash, get a battery, do a coolant burp and hit the road.

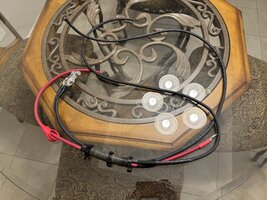
Cables tied together and lengths approximate. Starter boot slid on from the battery end since the other end was crimped and too large for the boot to go over:

IMG_4670.jpeg

The bundle taped in the middle and boot in proper spot:
IMG_4673.jpeg

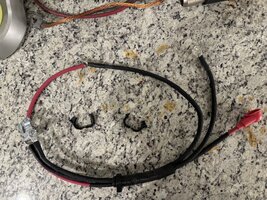
Taping done on the grounds and the starter end of the positive:
IMG_4674.jpeg

Center loom added at the bundle and separate looms added at all the individual wires:
IMG_4675.jpeg

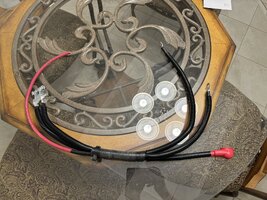
Loom ends all taped with Polyken
IMG_4676.jpeg

Positive battery end taped:
IMG_4677.jpeg

Positive battery loomed and ends taped:
IMG_4679.jpeg

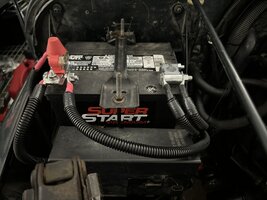
Installed:
IMG_4731.jpeg
IMG_4732.jpeg
IMG_4690.jpeg
 
Last edited:
Nice work. Looks factory but better. I like your attention to detail on the wiring, I try to do the same. My last YJ had so many freaking wire nuts all through the harness, it was ridiculous.
Hah, I hate to admit it, but I may have used wire nuts on the stereo adapter harness 11 years ago…I figured if Crutchfield sold them, they had to be okay right? Even as a complete and total newb who didn’t know better, it felt totally wrong. But I had 0 wiring tools nor know how so I didn’t know what else to do…and I really wanted that aftermarket stereo in. So I went on with them. They did end up working fine until I yanked them for a crimped solution a few years later.

Thanks for the kind words. I find my biggest motivation for good work is seeing the crap I’ve done in the past and wanting to improve what I don’t like about it. My last battery cables weren’t even crap as far as functioning as a cable, but I just really didn’t like the way they turned out. Remove them from the battery and they’d fall down into the under-battery area. If not zip tied, they’d flop around. They were heavy, and being thicker they were hard to route. It just wasn’t ideal and stuff like that really pushes me to fix all the complaints I have when I revisit it in round 2. So to follow the theme of the thread, once again I ended up following the stock design, lol.

The part I hate about wiring is it seems like every time I dive into a project, I’m missing a bunch of random stuff that nickels and dimes me to death. Every wiring project turns expensive. I have also learned that everything looks pretty when covered with enough tape and loom.
 
Last edited: